One key aspect of architectural design in Revit revolves around walls – their creation, modification, and, crucially, their joining. However, understanding how to join walls in Revit isn’t just a fundamental skill; it’s an art form that can dramatically impact the functionality and aesthetics of your designs.
This comprehensive guide will demystify the process of joining walls in Revit. We’ll cover the basics, delve into more complex techniques, discuss common challenges, and offer practical solutions. Whether you’re a beginner just starting out or an experienced designer looking to brush up on your skills, this guide aims to provide valuable insights that will help you become more proficient in using Revit.
Key Takeaways
- Joining walls in Revit is a crucial skill for creating seamless, precise architectural designs.
- Revit offers several tools for joining walls, such as the Join Geometry tool, Clean Join feature, and more advanced techniques using Parts.
- Understanding wall priorities, the use of compound walls, and the implementation of curtain walls can enhance your wall joining techniques.
- Several plugins can streamline the process of joining walls in Revit, including ‘Join Manager’ and ‘DiRoots.’
- Regularly checking for unjoined walls and using the Disallow Join command where necessary are part of the best practices in Revit.
How to Join Walls in Revit
Joining walls in Revit is a task that’s straightforward in most scenarios. However, it can get complicated when dealing with varying wall types, intersecting angles, or advanced architectural structures. Here’s a step-by-step guide on how to join walls in Revit.
- Open your Revit project: Launch Autodesk Revit and open the project in which you’d like to join walls. You can do this by navigating to ‘File’ > ‘Open,’ then choosing your project.
- Identify the walls to be joined: In your floor plan view or 3D view, identify the walls that you want to join.
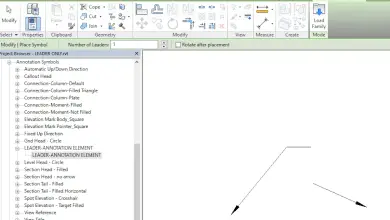
- Use the Join tool: Navigate to the ‘Modify’ tab in the ribbon menu at the top. Under the ‘Geometry’ panel, you’ll find the ‘Join’ tool.
- Select the walls: Click the ‘Join’ tool and select the two walls you want to join. First, select one wall, and then click on the second wall.
- Review the join: After the join operation, inspect the walls to confirm they have been joined correctly.
Common Problems and Solutions When Joining Walls in Revit
Even with the above steps, you might encounter a few hiccups when joining walls in Revit. Here are a few common problems and their respective solutions:
| Problem | Solution |
|---|---|
| Walls of different types cannot join | Use the ‘Wall Joins’ tool to modify the join |
| Walls at non-orthogonal angles | Use ‘Cut Geometry’ or ‘Shape Editing’ tools |
| Joining walls with varying heights | Adjust base or top constraints before joining |
Let’s delve deeper into these solutions.
Joining Walls of Different Types
When attempting to join two walls of different types, such as a brick wall and a drywall, the ‘Join’ tool may not work as expected. In such cases, the ‘Wall Joins’ tool can be of help.
- Navigate to the ‘Modify’ tab and select ‘Wall Joins.’
- Click on the join you want to modify. A dropdown menu will appear, offering different join types, such as ‘Butt,’ ‘Miter,’ and ‘Square Off.’
- Select the appropriate option and click ‘OK.’
Joining Walls at Non-Orthogonal Angles
For walls intersecting at non-orthogonal angles, use the ‘Cut Geometry’ or ‘Shape Editing’ tools.
Cut Geometry:
- Go to the ‘Modify’ tab, and under the ‘Geometry’ panel, select ‘Cut.’
- First, click the wall you want to keep, and then the wall you want to cut.
Shape Editing:
- Go to the ‘Modify’ tab, select ‘Shape Editing,’ then ‘Add Split Line.
- Draw your split lines along the intersecting edges of the walls.
- Select ‘Modify Sub Elements’ and adjust the points to match the desired angle.
Joining Walls with Varying Heights
Joining walls of varying heights requires adjustments in the base or top constraints before joining the walls.
- Select the wall you want to adjust.
- In the ‘Properties’ panel, adjust the ‘Base Constraint’ or ‘Top Constraint’ as needed.
- Once the walls have the same height, you can join them as described in the steps above.
Advanced Joining Techniques in Revit
Beyond the basics, there are advanced techniques that can prove useful when working on complex architectural designs in Revit. These include creating compound walls, using parts for complex joins, or employing curtain walls.
Compound Walls
Compound walls allow you to join different wall types into a single entity.
- Go to the ‘Architecture’ tab, select ‘Wall,’ then ‘Wall: Architectural.’
- In the ‘Properties’ panel, select ‘Edit Type.’
- Click ‘Duplicate’ to create a new wall type, then select ‘Edit’ under ‘Structure.’
- Here, you can add layers representing different wall types, which are joined within the compound wall.
Using Parts for Complex Joins
Revit Parts can be used for creating complex joins that would otherwise be challenging with the standard join tools.
- Select a wall, then navigate to the ‘Modify’ tab.
- In the ‘Create’ panel, select ‘Create Parts.’
- Use the ‘Divide Parts’ and ‘Exclude Parts’ tools to tailor the join to your needs.
Curtain Walls
In Revit, curtain walls can be joined to other walls using similar techniques as standard walls. However, be aware that only the primary wall within the curtain wall can be joined.
- Navigate to the ‘Architecture’ tab and select ‘Wall.’
- Choose ‘Curtain Wall’ from the dropdown menu and draw your wall.
- Follow the steps for joining standard walls.
For a more comprehensive understanding of advanced techniques, the Autodesk University offers several courses and webinars on Autodesk Revit.
This guide provides a detailed walkthrough on joining walls in Revit, tackling common issues and highlighting advanced techniques. By understanding these methods, you can ensure your architectural designs in Revit are accurate, flexible, and high-quality.
Besides knowing the how-to, it’s equally crucial to understand the best practices when joining walls in Revit. These can make your design process smoother and more efficient.
Use Clean Join Where Possible
‘Clean Join’ is a feature that automatically cleans up the intersection of three or more walls. This is particularly useful in complex designs with multiple intersecting walls. To use this feature, select the walls you want to join and click ‘Clean Join’ under the ‘Modify’ tab.
Understand Wall Priorities
Wall priorities can affect how walls join. In Revit, the priority is given to the wall with the highest ranking material. Knowing how to manipulate wall priorities in the type properties can allow for better control over the wall joins.
Check for Unjoined Walls Regularly
It’s a good practice to regularly check for unjoined walls in your design, especially in large projects. You can do this by using the ‘Join Status’ tool under the ‘Analyze’ tab.
Use Disallow Join Where Necessary
Sometimes, you may not want walls to join, even if they intersect. The ‘Disallow Join’ command, found under the ‘Modify’ tab, is handy in such cases.
Leveraging Revit Plugins for Wall Joining
There are several Revit plugins available that can help streamline the process of joining walls. Here are some options:
- Join Manager: This tool automates the process of joining, unjoining, and switching joins.
- DiRoots: Offers several tools for Revit, including the ‘AutoJoin’ tool which joins all elements of the same category.
FAQ:
1. How to join walls in revit?
Joining walls in Revit is achieved by using the Join Geometry tool found under the Modify tab in the Ribbon Menu. You begin by selecting the tool, then you click on two separate walls that you wish to join. If the walls are joinable, they will merge into a continuous wall. If they are not, Revit will give a warning message explaining why the join cannot be executed.
2. How do you join parts in Revit?
Parts in Revit are created when you divide a building element like a wall or floor into more manageable sections. To join parts in Revit, you can use the Merge Parts tool. This can be found under the Modify Parts tab in the Ribbon Menu. By selecting the Merge Parts tool, and then selecting two or more parts, you can join them into a single part.
3. How do you chain walls in Revit?
In Revit, chaining walls refers to creating a series of walls that are automatically joined or connected. This can be done using the Wall tool from the Architecture tab in the Ribbon Menu. By drawing the walls end-to-end in a continuous operation, they will automatically chain together. This can be very useful when creating a complex building outline.
4. How do you put a wall in another wall in Revit?
In Revit, you can place a wall within another wall by using the Wall tool and choosing the appropriate wall type. Start the Wall command, then pick the starting point inside the existing wall. Continue to draw the new wall inside the existing one, and they will automatically join. If you want to maintain the two walls separately, you can use the Disallow Join command.
5. Is there a JOIN command in Revit?
Yes, Revit has a Join command. It is known as the Join Geometry tool and is found under the Modify tab in the Ribbon Menu. This tool allows you to join two separate elements, such as walls or floors, so that they intersect seamlessly.
6. Can you merge walls in Revit?
Yes, you can merge walls in Revit by using the Join Geometry tool. This allows two separate walls to become a single, continuous wall. However, it’s worth noting that the walls need to be of the same type and meet certain conditions to be able to merge successfully.
7. How do you join a wall and floor in Revit?
To join a wall and floor in Revit, you use the Join Geometry tool. You first select the tool, then click on the wall and floor you wish to join. The tool will allow the wall and floor to intersect seamlessly, creating a clean join.
8. What is a curtain wall in Revit?
A curtain wall in Revit is a non-structural wall used typically in exterior applications. They are made up of repeating units called curtain wall grids and can contain other elements like doors and windows. Curtain walls are widely used in modern architecture for their aesthetic appeal and ability to allow natural light into a building.
9. What is a curtain wall embed?
A curtain wall embed in Revit refers to any element such as a window, door, or another wall that is placed within a curtain wall. These elements are embedded into the curtain wall grid and act as part of the curtain wall system. They can be customized and manipulated just like any other component of a curtain wall.
10. How do you disallow a wall join in Revit?
To disallow a wall join in Revit, you can use the Disallow Join command found in the Modify tab in the Ribbon Menu. This is done by first selecting the Disallow Join tool, and then clicking on the join you wish to prevent. This can be useful when you want to maintain separate elements in your design.
11. What does ‘Clean Join’ mean in Revit?
The ‘Clean Join’ tool in Revit is an automatic feature that tidies up the intersection of three or more walls. This command eliminates unnecessary lines and inconsistencies, giving the intersection a more refined look. It’s especially helpful in designs with numerous intersecting walls.
12. Can I create non-rectangular walls in Revit?
Yes, in Revit you can create non-rectangular walls using the Wall tool and Sketch option. This allows you to draw a custom path for your wall, creating any shape you desire. You can create non-rectangular walls either in a plan view or a 3D view.
13. What is a compound wall in Revit?
A compound wall in Revit is a type of wall that consists of multiple layers. Each layer can represent a different material, making compound walls great for representing realistic wall constructions. Compound walls can be customized and edited in the type properties.
14. How do I manage wall priorities in Revit?
Wall priorities in Revit can be managed through the type properties of a wall. Here you can assign a ranking to each layer of a compound wall. During a wall join operation, the material with the highest ranking takes precedence. This allows for better control over how walls are joined.
15. Can I adjust the height of walls before joining them in Revit?
Yes, in Revit, the height of walls can be adjusted before joining them. This can be done by selecting a wall and adjusting the ‘Base Constraint’ or ‘Top Constraint’ in the properties panel.
16. Are there any plugins that can help with wall joining in Revit?
Yes, there are several plugins available for Revit that can simplify the wall joining process. Tools like ‘Join Manager’ and ‘DiRoots’ offer automated joining capabilities, saving time and enhancing accuracy in large or complex projects.
Conclusion
Mastering the art of joining walls in Revit can significantly enhance your productivity and the quality of your architectural designs. This skill, coupled with a deep understanding of Revit’s capabilities, enables you to create models that are not only aesthetically pleasing but also precise, functional, and rich in information.
We hope that this guide has illuminated the process, providing practical knowledge that will assist you in your journey with Revit. Remember, in the world of architectural design, continuous learning is the key. Keep exploring, experimenting, and pushing the boundaries of what’s possible with Autodesk Revit. Happy designing!