How to create a page Setup For Layouts
Free AutoCAD tutorial how to create a page Setup For Layouts
Using Layouts for plotting requires a different approach for drawing
scale (compared to plotting from the Model tab)
- you Insert a title block (or import a layout with a title block) at the same size that the title block should be in final plots (full scale).
- then you create viewports on the PAPER to display your model from that layout.
- you control the drawing scale for viewports by adjusting the view magnification in each viewport on a layout.
- when layouts have been created using this approach you can Plot a layout using a 1:1 plot scale (for all drawing scales).

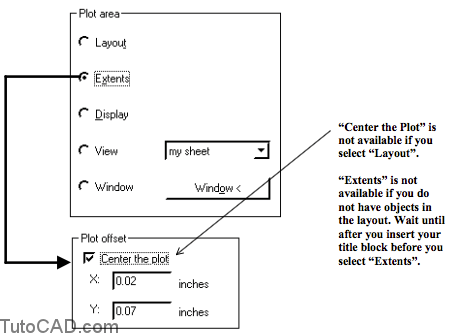
Select Extents as the Plot area so you can check Center the plot in the Plot offset options.
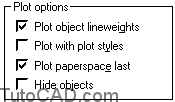
You can Scale lineweights (not available when you Plot the Model) when layouts use plot scales other than 1:1.

You can Plot paperspace last so ink for these objects appears on top of the ink for objects in the Model.
You can apply what you have already learned about Layout Settings on the Model tab when you use Page Setup on Layouts.
- the primary difference is how to set up drawing scales with respect to plot scales.
Practice tutorial using Page Setup on a layout in AutoCAD
- Close the drawing from the previous exercise if it is open.
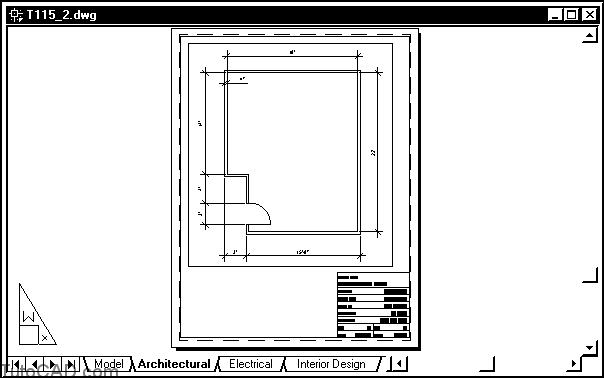
- Open the T115_2.dwg drawing in your personal folder.

3- Select the Architectural tab to make this the current layout. Then right-click on the Architectural tab and select Page Setup from the shortcut. On the Plot Device tab select the HP LaserJet.pc3 device Name (or the device file name that your instructor tells you to use). Adjust settings shown below on the Layout Settings tab and pick OK.

4- Pick File + Plot Preview then press <enter> to continue.

5- Pick Format + Layer and click on the lineweight for the WALLS layer and select 0.50 mm and pick OK. Then pick OK to complete the layer change.

Now all objects on the WALLS layer should have a 0.50 mm lineweight when you Plot
– the LWT status bar button does NOT control whether or not lineweights appear in the plot.
– the LWT status bar button controls whether or not lineweights are displayed on the screen.
6- Verify that LWT is pushed out (Off) on the status bar. If this button is pushed in (On) then left-click on it to toggle Lineweight display off.
![]()
7- Pick File + Plot Preview and drag your pointer upwards to Zoom into a closer view of the plot preview so you can see the difference in lineweight between the WALLS layer and the DIMENSIONS layer. Then press <enter> to continue.

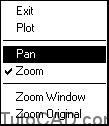
You can Zoom In or Zoom Out in a plot preview by dragging your cursor up or down.
– zoom in to the desired view magnification.
– then right-click for a shortcut and select Pan to pan the desired area of the preview into the display.
8- Right-click on the Architectural tab & select Page Setup from a shortcut. On the Layout Settings tab change the Plot scale to 1:2. Then pick OK.

You immediately see the plot scale change reflected by the size of the drawing objects relative to the size of the sheet.
– you do not have to use the Preview command to see that there is something wrong with this plot scale/sheet size combination.
9- Pick View + Zoom + Extents.

10- Pick View + Zoom + All.

When you change your plot scale in the Page Setup of a layout you are redefining the layout drawing limits in paper space.
– Zoom All displays the drawing area inside the current LIMITS. – Zoom Extents displays all objects that are on thawed layers.
11- Close the active drawing without saving changes.