Setting & Locking Viewport Scale
The standard approach is to Plot layouts at a scale of 1:1.
- you have already set up your A Size – Portrait layout to use a Plot scale of 1:1 (see step 6 on page 10).
- you must set viewport display magnification (scale) relative to paper space so viewports Plot at the required drawing scale.
Zoom Scale
One way to precisely set a viewport display magnification is to use the Scale option of the Zoom command.
- make the desired viewport the current viewport.
- use Zoom Scale and enter the scale factor followed by XP.
- for example, to use a 1⁄4 ” = 1’ scale (1:48) you could enter 1/48XP on the command line at the Zoom Scale prompt.
Viewports Toolbar
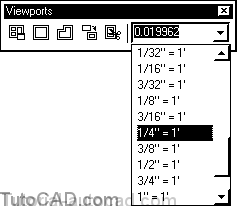
There is also a drop-down list for viewport display magnification scale in the Viewports toolbar
- make the desired viewport the current viewport and select the required drawing scale from the drop-down list.

You can type scales directly in this box.
- type the scale as a decimal number ( e.g. 0.0208333 ) or type the scale as you would as a drawing scale (e.g. 1:48).
You can lock the viewport display magnification scale once you have decided on the final scale to use in plots.
- this can help prevent accidental changes to viewport scales (e.g. using Zoom in the MODEL while creating a dimension).
- you can unlock or lock any viewport at any time which means it is more of a safety feature than a security tool for other users.
You can still Stretch the viewport border after locking it and you can Move or Copy the viewport in the layout.
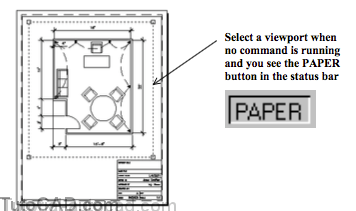
- but if you try to use Display commands (e.g. Zoom) when you are in a locked viewport you are temporarily switched to PAPER.
- the display command then resumes so you can adjust the entire paper space (e.g. Zoom in to create a dimension)
- you return automatically to the MODEL (with the viewport scale unchanged) when you complete the display command.
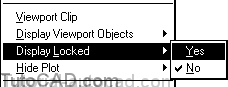
Select the desired viewport when PAPER is in the status bar (with no command running) to change the locked status of a viewport.
- the viewport border will be highlighted and you should see the viewport border grips appear.
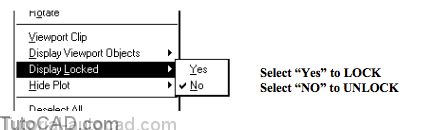
- then right-click in the drawing area to invoke a shortcut menu and select the Display Locked menu option.
PRACTICE SETTING PRECISE SCALES AND LOCKING VIEWPORT DISPLAYS
» 1) Continue from the last exercise. You should see the MODEL button in the status bar and be in the A Size – Portrait layout. The Viewports toolbar should also be displayed.
» 2) Drop down the scale list in the Viewports toolbar. Scroll down this list and select the 1/4”=1’ scale.
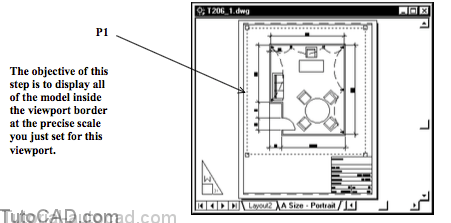
3) Left-click on MODEL in the status bar to switch back out to the PAPER. Then select the viewport border near P1.
4) If all of your model is displayed inside the viewport border you can go to the next step. Otherwise, click on a corner grip to make it hot and then pick a new point for the corner. Repeat as required for the other corners.
You do NOT change viewport scale when you Stretch viewports
- you can also use Pan (with the MODEL button displayed on the status bar) without changing viewport display scale.
5) With the viewport still highlighted, right-click in the drawing area to invoke the shortcut menu. Select Display Locked then pick Yes.
6) Double-click in the viewport to switch to the MODEL.
7) Pick View + Zoom + Window and pick near P1 then P2 to display the model at a higher magnification.
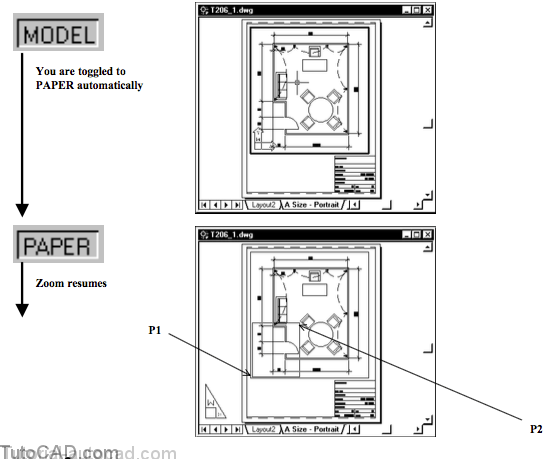
You automatically toggle to PAPER when you try to use a display command on the MODEL viewed inside a locked viewport.
When you complete the Zoom command the display for the entire page has been changed (not just the view inside the viewport)
- and you are back in the MODEL automatically again.
- the viewport scale has not been changed and it should still be set to use 1/4”=1’ in the Viewport toolbar.

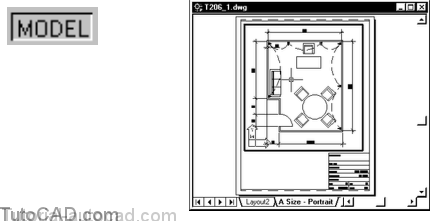
» 8) Pick View + Zoom + Previous to return to the previous view. Then press F2 to examine the command history and press F2 again to return to the graphic window.
Command: ‘_zoom
Viewport is view-locked. Switching to Paper space.
Specify corner of window, enter a scale factor (nX or nXP), or [All/Center/Dynamic/Extents/Previous/Scale/Window] <real time>: _p Switching back to Model space.
Command:
» 9) Left-click on MODEL in the status bar to switch to PAPER.
» 10) Pick Modify + Attribute + Single and select any part of the title block to invoke the Edit Attributes dialogue box. Use the illustrations below to update the title block on this layout then pick OK. (you must pick Next to see all attributes).
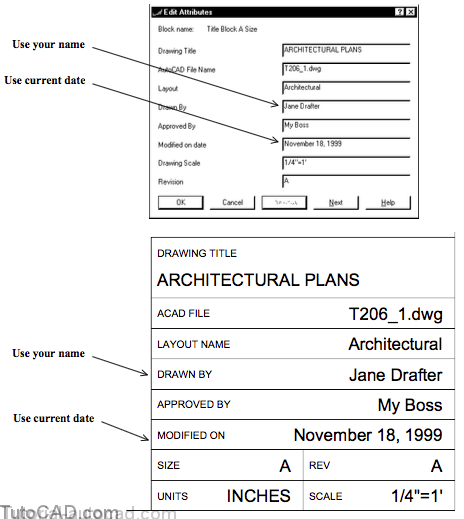
Your custom title blocks should include the Layout Name.
- then it will be easier to locate plans if you use multiple layouts in the same drawing file.
11) Right-click on the Size A – Portrait layout tab and select Page Setup from the shortcut menu. Change the Layout name to Architectural and pick OK.

12) Pick File + Save to update your changes to T206_1.dwg.