How to copy Hatch Properties
Here is how to copy Hatch Properties in AutoCAD
You can copy the properties of an existing HATCH object using two different methods.
- if you are creating a new HATCH object you can use the Inherit Properties feature in the Boundary Hatch dialogue box.
- if you are updating an existing HATCH object you can use the Matchprop command.
- both methods help to create consistent HATCH objects in your drawings without having to know much about these properties.
To use the Inherit Properties approach you can use the Bhatch command in the usual way.
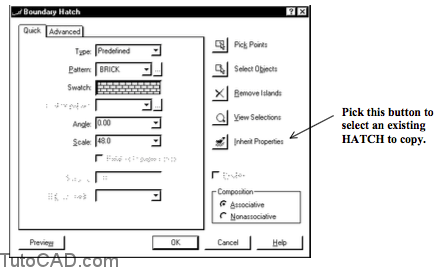
- however, instead of specifying individual properties you pick the Inherit Properties button to select an existing HATCH to copy.

The Matchprop command can be used to copy HATCH (and other) properties of a source object to destination objects.
- the source and destination objects can even be in different (open) drawings which makes this a practical tool.
Practice tutorial: copying hatch properties of existing HATCH objects in AutoCAD
1- Close the drawing from the previous exercise if it is open.
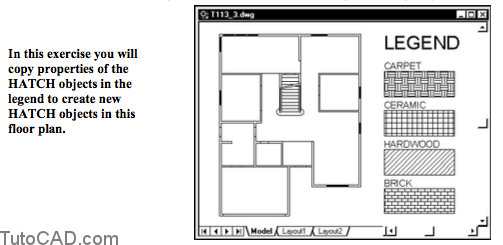
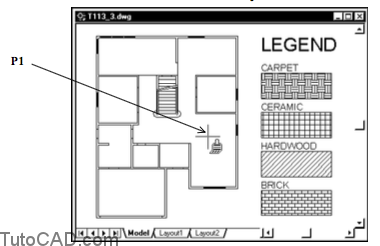
2- Open the T113_3.dwg drawing in your personal folder.
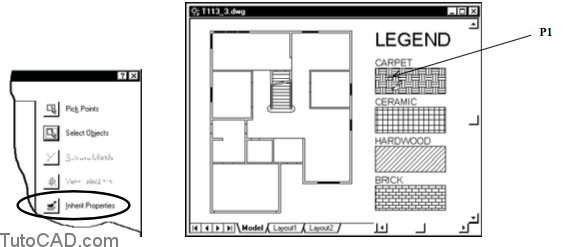
3- Pick Draw + Hatch. Pick the Inherit Properties button and your cursor will turn into a paint brush. Left-click on the HATCH object for CARPET in the legend near P1.
AutoCAD knows how the selected HATCH was created when you select an existing HATCH object to inherit hatch properties.
– if the selected HATCH was created with the Pick Points button you are prompted to pick an internal point for the new HATCH.
– if the selected HATCH was created with the Select Objects button you are prompted to select objects for the new HATCH.
4- Left-click in the floor plan near P1 as the internal point and then press <enter> to return to the dialogue box. Pick OK to create the new HATCH object for this area.
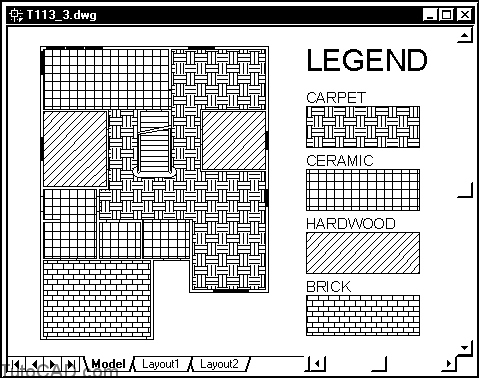
5- Use a similar technique to create the other HATCH objects in the floor plan as shown below.
6- Save the changes to this drawing and Close the file.
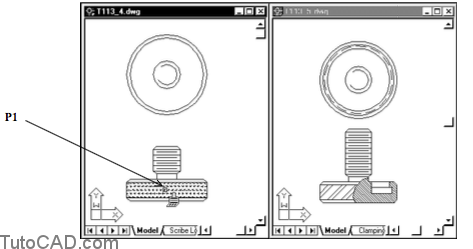
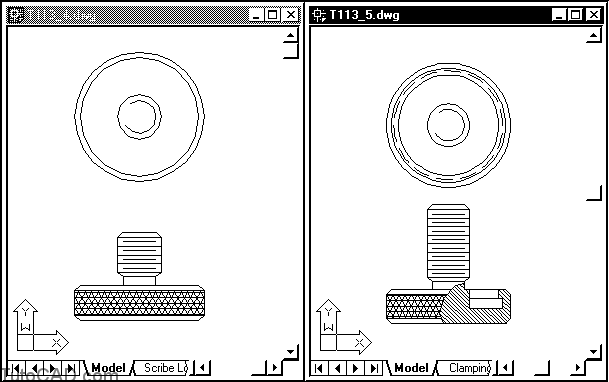
7- Open both T113_4.dwg and T113_5.dwg drawings in your personal folder.
8- Make T113_4.dwg the active drawing.
9- Pick Window + Tile Vertically to arrange both drawings in their own windows. You may want to Zoom Extents in each drawing window to see the entire model in each window.
In the next step you will copy the hatch properties of one HATCH object to another HATCH object in a different drawing file.
10- Pick Modify + Match Properties. Select the HATCH object near P1 in the T113_4.dwg file as the source object.
11- Right-click in the drawing area to invoke a shortcut and select Settings. Uncheck Layer and pick OK to continue.

12- Left-click once in the T113_5.dwg drawing window to make this the active drawing. Then left-click on the HATCH near P2 to select this as a destination object & press <enter>.
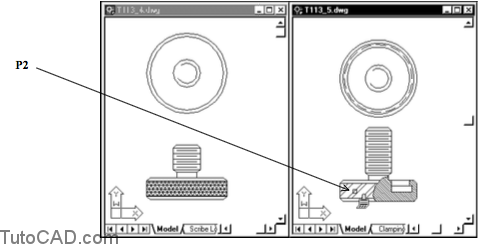
Now the HATCH properties are the same in both drawing files.
You can also use Matchprop for objects in the same drawing file.
You unchecked Layer in Settings so the Layer property of the source object was not copied to the destination object.
– you have complete control over which properties are copied.
– the currently selected properties are listed on the command line when you invoke Matchprop.
13- Save the changes to both drawings & Close these files.