How to Create and Modify Text Styles
Free tutorial how to Create and Modify Text Styles in AutoCAD

Text styles control the appearance of TEXT objects using the parameters that you assign for the selected Font & desired Effects.
- AutoCAD uses the current text style when you create new TEXT objects with Dtext.
- invoke the Style option of Dtext to select a different text style for new TEXT objects (this becomes the current style as well).
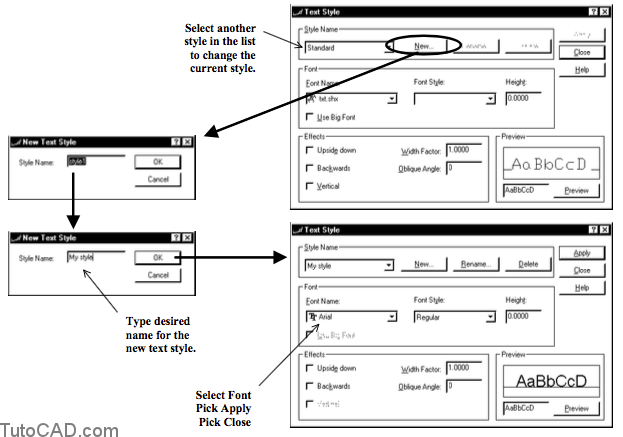
- you can also invoke the Style command & select the desired style in the Text Style dialogue box to change the current style.
New drawings created from scratch have the Standard text style already defined & this style uses the simple txt.shx font by default.
- use Style to define custom text styles with more attractive fonts.
- define your (custom) text styles in the (custom) template files that you use to start New drawings from a template.
The Font Name is the most important parameter in text styles and this may be the only parameter that you need to change.
– if you create technical drawings then the default settings for all other parameters should produce acceptable results.
TrueType fonts
AutoCAD is supplied with many standard fonts but you can also use any TrueType font installed on your system.
- some parameters (e.g. Font Style) only apply for TrueType fonts.
AutoCAD originally used ONLY .shx fonts and these fonts were
designed for pen plotters & computer hardware used at that time.
- .shx fonts continue to be used today as they usually regenerate and redraw faster on-screen than TrueType fonts.
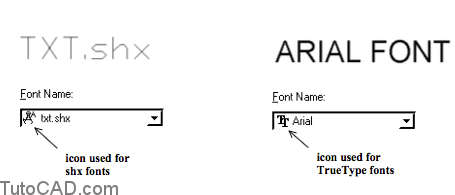
- you will know whether fonts are .shx or TrueType from the icon beside selected Font Names in the Text Styles dialogue box.
Postscript fonts
- AutoCAD also supports postscript fonts but your plot device must be a postscript device.
- use AutoCAD Help on the Psout command for more information.
- If you plan to distribute drawings you should realize that font files are stored separately from drawing files.
- your TEXT will not appear the same on other systems if you use fonts that are not available on these systems.
- use standard AutoCAD (e.g. shx) fonts supplied with AutoCAD or standard Windows fonts (e.g. Arial) if possible.
- use AutoCAD Help on font mapping for more information.
- Height for text styles is zero by default which means each time you use Dtext you can specify the text height for the new TEXT object.
- if you use a fixed height (non-zero value) in a text style you are NOT prompted for text height when you use Dtext with that style.
- for example, create a Layout Notes text style & use the value for height that you want notes in layouts to Plot at (1:1 scale).
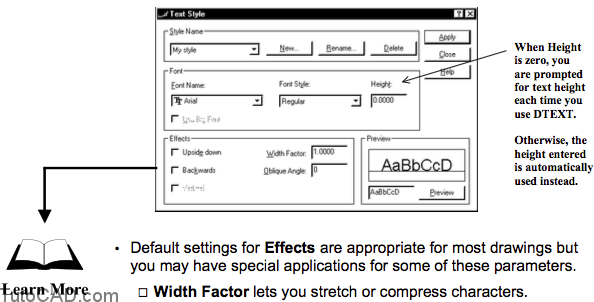
- Default settings for Effects are appropriate for most drawings but you may have special applications for some of these parameters.
- -Width Factor lets you stretch or compress characters.

- -Oblique Angle makes characters lean forward or backward.

- -Backwards, Upside Down & Vertical are self explanatory (Vertical is not available for all fonts).

Tutorial : creating & using new text styles in AutoCAD
- Close the drawing from the previous exercise if it is open.
- Open the T110_3.dwg drawing in your personal folder.
- Pick Format + Text Style then pick the New button there.

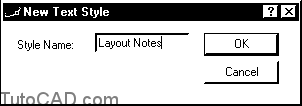
- A dialogue box will appear with Style1 already selected. Type Layout Notes to replace this as the Style Name for the New Text Style and pick OK to continue.
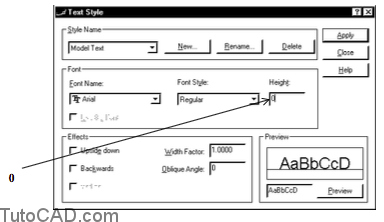
- Select Arial as the Font Name for this new style. Enter 0.125 as the Text Height then pick the Apply button to apply these changes to the current style (remain in this dialogue box).

- Pick the New button in the Style dialogue box again and this time enter Model Text as the new Style Name and pick OK.
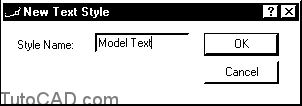
- Change the Height to 0 and then pick Apply and Close without making any other changes. (Note that the Font Name is still Arial)
You just created two new text styles.
- -Layout Notes uses Arial as the font and is a fixed height style that will always make TEXT that is 0.125 when you use Dtext.
- -Model Text also uses Arial as the font but it is a variable height style so you can use different heights each time you use Dtext.
- Pick Draw + Text + Single Line Text. Observe the prompt without doing anything (yet).
Command: _dtext
Current text style: “Model Text” Text height: 6.0000
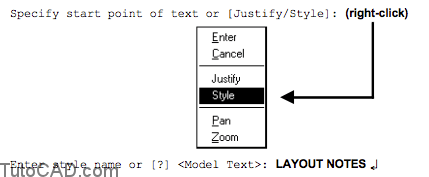
Specify start point of text or [Justify/Style]:
The current text style is Model Text because this was the last style listed in the Style dialogue box drop-down list.
– AutoCAD reminds you which text style is the current style when you invoke the Dtext command.
- Right-click in the drawing area and select Style from the shortcut. Then type Layout Notes when prompted for the name of the desired style.
- Left-click on the OSNAP status bar button to turn it Off (if it is On)
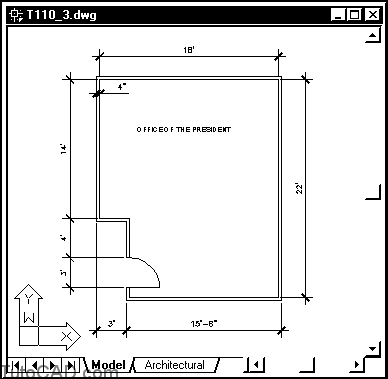
- Pick near P1 as the start of text point and follow the dialogue below to complete the three lines of TEXT as shown.

You used the Style option of Dtext to change the current text style. The current text style is a fixed height text style so AutoCAD did
NOT prompt you for the text height when you used Dtext.
- Pick View + Zoom + Window and zoom in for a closer look at the new text you just created. Then select the Model tab to switch from the Architectural Layout to the Model.

- Pick Format + Text Styles. Select Model Text as the new current text style from the drop-down list and pick Close.
 When you used the Style option in the last Dtext command you changed the current text style to Layout Notes.
– this time you set the current text style before running Dtext.
– it is easier to see the existing text styles in the Style dialogue box and you can select them from a list (instead of typing the name).
- Pick Draw + Text + Single Line Text. Follow the dialogue below to create the TEXT object in model space.
Command: _dtext
Current text style: “Model Text” Text height: 6.0000
Specify start point of text or [Justify/Style]: (pick near P1)
Specify height <6.0000>: ↵
Specify rotation angle of text <0>: ↵
Enter text: OFFICE OF THE PRESIDENT ↵
Enter text: ↵
Command:
more practice
- Save the changes to this drawing and Close the file.
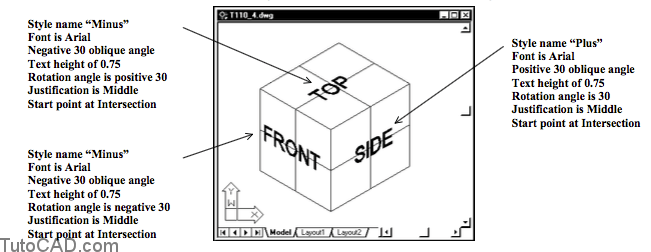
- Open the T110_4.dwg drawing in your personal folder.
- Define two text styles in which one style has a 30 oblique angle & the other has a negative 30 oblique angle. Use these styles to create the three TEXT objects as shown.
- Save the changes to this drawing and Close the file.