Creating Rectangular Viewports

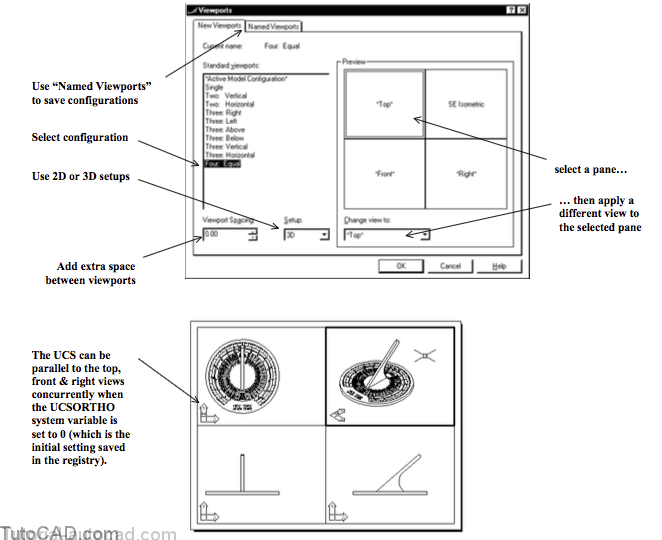
You can use Vports to create a variety of viewport configurations in paper space or model space.
- this is particularly useful to set up top, front, right andIsometric viewports for mechanical 3D applications.
- each viewport can also have a different UCS which makes it easier to create parts in 3D.
- the utility is also useful to set up several viewports at the same time for 2D applications.
You will probably create single viewports most of the time.
- the Viewports toolbar has a Single Viewport button that uses the default <Fit> option of Vports in the command line mode. – you could achieve the same results by typing a hyphen before typing VPORTS on the command line (i.e. –VPORTS ).
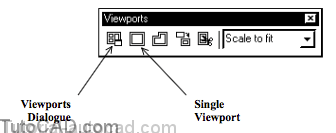
The Viewports toolbar is practical to have open when you are creating and managing viewports in paper space.
- this is a fast way to create viewports one-at-a-time.
- you will use it to create a new viewport in the following exercise.
PRACTICE CREATING A SIMPLE RECTANGULAR VIEWPORT
» 1) Continue in the same drawing from the last exercise.
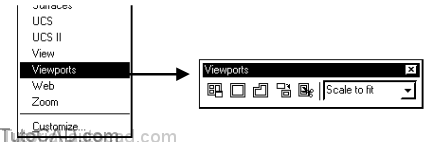
» 2) Right-click on ANY toolbar to invoke a shortcut and selectViewports (if it is not already checked).
3) Make VIEWPORT the current Layer by selecting it in the Object Property layer control drop down list.

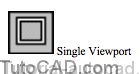
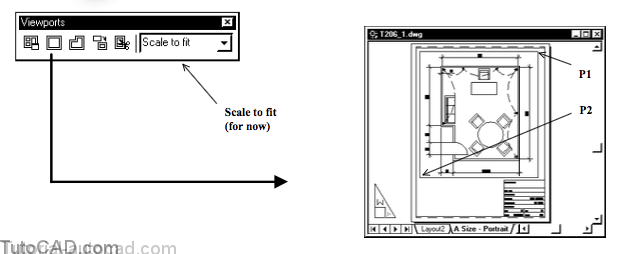
4) Pick the Single Viewport button (second from left end) of the Viewports toolbar to create a new rectangular viewport. Then pick two corner points by eye near P1 and P2. The Viewports toolbar should be Scale to Fit for now.
5) Double-click inside the new viewport you just created on the A Size – Portrait layout to switch to the MODEL. Observe the Viewports toolbar again.

Your viewport toolbar should now show the display magnification of the current viewport in the drop down list.
- it will probably be different than the one shown above because you picked the viewport corners by eye.
- the viewport display was set to use Scale to fit.
» 6) Pick File + Save to update your changes to T206_1.dwg and prepare for the next exercise.