Generating 2D Views With SOLDRAW in a 3D drawing
Once viewports have been properly set up you can use Soldraw to automatically create the drawing views for each viewport.
- you are prompted to select viewports created by Solview.
- you are automatically switched to paper space when you invoke Solview (if PAPER is not already displayed in the status bar).

AutoCAD generates 2D geometry for each viewport and places these new objects in the MODEL on appropriate layers.
- you can change the special layer colors & linetypes (e.g. use HIDDEN linetype for *HID layers) to suit drafting standards.
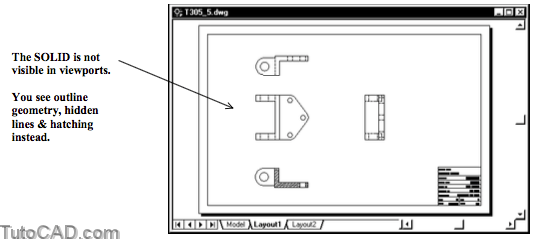
- the illustration below is a Plot Preview after using Soldraw.
PRACTICE GENERATING 2D GEOMETRY USING SOLDRAW
» 1) Open the T305_5.dwg file in your personal folder (or use your T305_2.dwg file if you completed the last exercise).
» 2) Pick Draw + Solids + Setup + Drawing. Select each of the 4 viewports in the layout and then press <enter> to complete the Soldraw command.

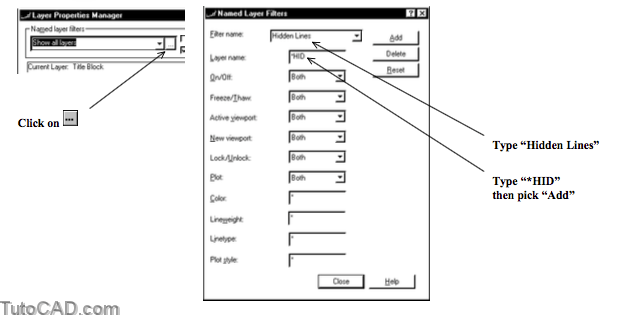
3) Pick Format + Layer. Pick the button to invoke the Named Layer Filters box. Type Hidden Lines as the Filter name and type *HID as the Layer name. Then pick Add then Close to return to the Layer dialogue box to continue.
4) Select the new Hidden Lines filter in the Named layer filters list then select all 4 layers that match this filter. Left-click on the Color for one of these layers & select Blue from the color palette. Pick OK to return to the Layer dialogue box.
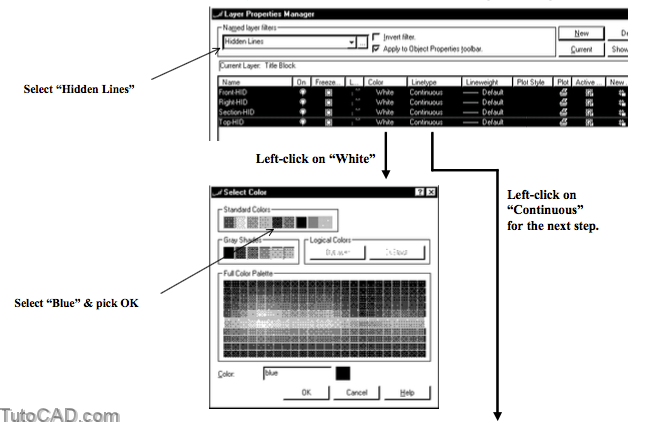
5) Left-click on the word “Continuous” for one of the selected layers to invoke the Select Linetype dialogue box. Pick HIDDEN2 and pick OK to return to the Layer dialogue box. Pick OK to complete these changes to hidden line layers.
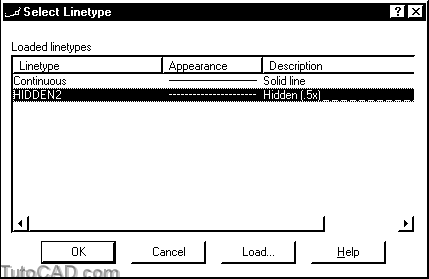
The HIDDEN2 linetype was already loaded in this drawing.
- otherwise you would have to Load it before you could assign it BYLAYER to these layers.
6) Pick File + Plot Preview and Zoom in to the area displayed below for a closer preview of the hidden lines in each view. Then press <Esc> to complete the Plot Preview.

The hidden lines in each view are now Blue and use the HIDDEN2 linetype as per your changes in the previous step.
7) Pick the Model tab to switch to the Model.
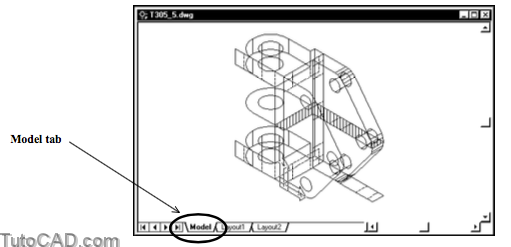
Your Layout1 tab is organized to filter out various layers in each viewport and display them from appropriate viewing directions.
- it is difficult to make sense from the same 2D geometry when you view it from the Model tab.
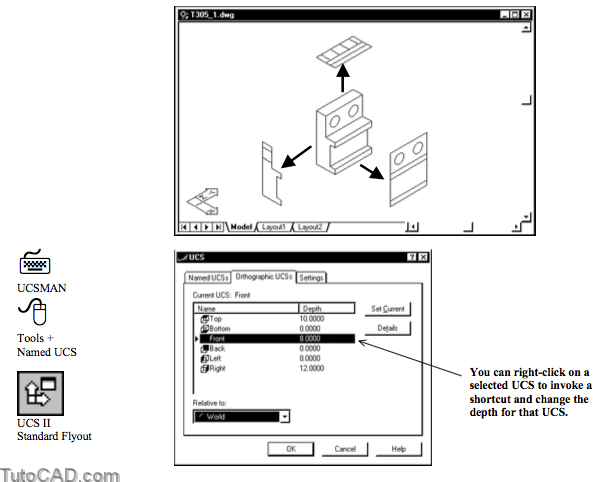
You can improve the organization of 2D geometry in the Model tab by changing the Depth of orthographic UCSs before using Soldraw
- or you could change the Depth of these UCSs after using Soldraw & Move 2D geometry to the XY plane for these UCSs.
8) Left-click on the Layout1 tab to switch back to this layout.
9)Save the changes to the current drawing to prepare for thenext exercise.
10) Close this file.