How to use Grips (Introduction)
Here is how to use Grips in AutoCAD
Up to now you have been invoking a command BEFORE selecting objects to edit.
- you can also select objects when no command is running and THEN select the desired edit operation to use.
- Left-click on objects when no command is running to select objects one at a time (or use implied Crossing or Window tools).
When objects are selected and no command is running you can right-click in the drawing area to invoke a shortcut menu.
- one section of this shortcut menu corresponds to the edit commands you have already learned how to use.
- use Erase, Move, Copy, Scale & Rotate from the shortcut in the same way that you used these commands in this document.

You can Move & Copy objects that are selected when no command is running without having to use the shortcut shown above.
- press and hold your right mouse button to drag the selected objects to a new location (approximate displacement by eye).
- select Move Here or Copy Here from a shortcut when you release your mouse button.
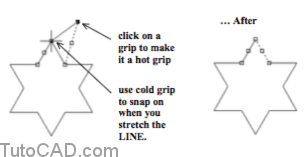
If you select an object when no command is running, that object is highlighted and grips on that object are displayed.
- grips are small boxes located at key geometric points for the object (such as Endpoints & Midpoints for LINE objects).
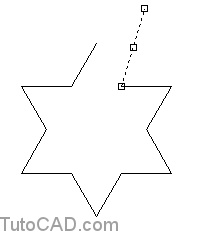
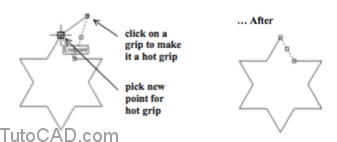
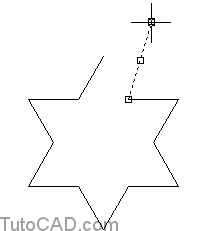
Hot Grips
Left-click on one of the grips to make it hot then **STRETCH** the selected object(s) by picking a new point for the hot grip.
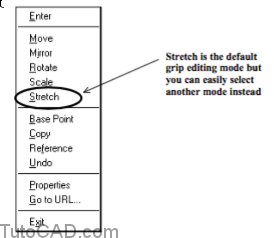
Other modes
When one of the grips is hot you can right-click in the drawing area to invoke a grip editing shortcut
- you begin in the Stretch mode by default but you can also select other modes from this shortcut menu.
Grips vs Osnaps
When you move your crosshairs near a grip they will snap to the grip as if the grip was a magnet.
- so you can use grips in place of object snaps.
Warm/Cold Grips
Grips on selected (highlighted) objects are called warm grips.
- if you press your <shift> key and select an object that is already selected you will de-select that object.
- grips on de-selected objects are called cold grips.

You can select objects then de-select them so those (de-selected) objects will not be changed if you perform a grip editing operation
- but the cold grips will be available to snap to without having to explicitly use object snaps.
Clearing Grips
Another way to convert warm grips to cold grips is to press the <Esc> key.
- all selected objects will then be de-selected but the grips on those objects will still be displayed (i.e. cold grips).
- if you press <Esc> again these cold grips disappear.
Editing with grips is a complicated subject for new AutoCAD users but you can accomplish basic tasks without having to master grips.
- the purpose of this section is to introduce you to what grips are and how you can perform basic grip editing tasks.
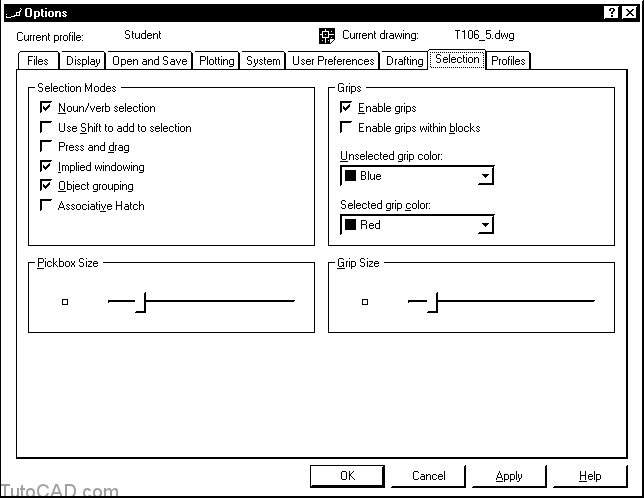
- the behavior described in this document assumes your system has been set up using the default settings for grips.
- several settings can affect grips and you can change them on the Selection tab of the Options dialogue box.
PRACTICE: EDITING OBJECTS WITH GRIPS IN AUTOCAD
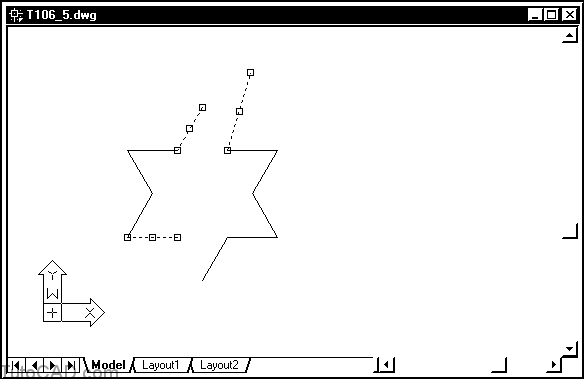
Step 1: Open the T106_5.dwg drawing in your personal folder.
Step 2: Left-click on the OSNAP status bar button (if it is On) to turn the automatic object snaps Off.
![]()
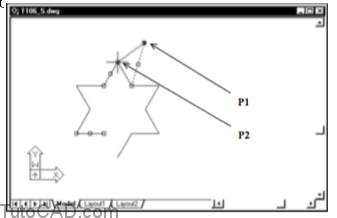
Step 3: Hold you crosshairs over the highlighted LINEs below (one at a time) and left-click to select them.
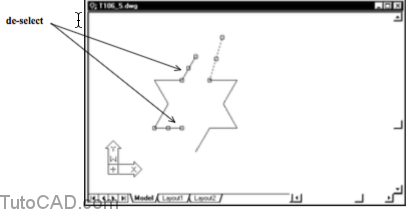
Step 4: Press and hold the <shift> key while you left-click on the two LINEs indicated below to de-select these LINEs. The grips of these LINEs should remain as cold grips.
Step 5: Left-click on the grip near P1 to make it hot. Them move your cursor to the cold grip near P2 and note how your cursor snaps to this grip. Then left-click to Stretch the selected LINE to this new end point.
Step 6: Left-click on the grip near P3 to make it hot again. Then right-click in the drawing area to invoke a shortcut. Select Move from the shortcut and then right-click in the drawing area again to invoke the same shortcut. This time select Copy from the shortcut to continue.
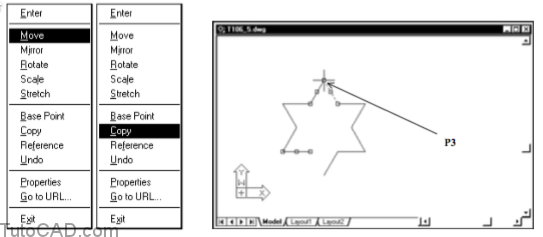
If you selected only Copy you would end up making a new stretched LINE in the next step
- whereas if you selected only Move the LINE would move leaving a gap in the shape where the original LINE was located.
- you have to select both Copy & Move in this step.
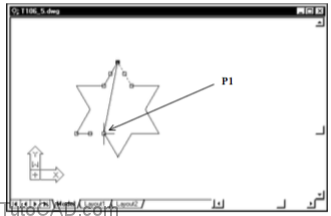
Step 7: Left-click on the grip near P1 to move a copy of the selected LINE. Then press <Esc> until to exit this mode and press <Esc> twice to clear the grips.

You were able to complete these edit tasks without having to select a command first from a menu
- and you snapped to precise points on objects without having to use object snaps.
Step 8: Save the changes to T106_5.dwg and Close this file.