How to create Rectangular Viewports
Free lesson how to create Rectangular Viewports in AutoCAD
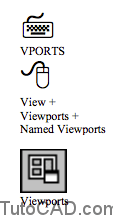
You can use Vports to create a variety of viewport configurations in paper space or model space.
- this is particularly useful to set up top, front, right and Isometric viewports for mechanical 3D applications.
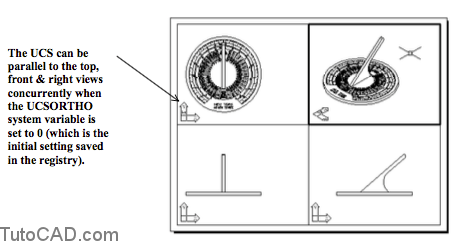
- each viewport can also have a different UCS which makes it easier to create parts in 3D.
- the utility is also useful to set up several viewports at the same time for 2D applications.

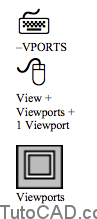
You will probably create single viewports most of the time.
- the Viewports toolbar has a Single Viewport button that uses the default <Fit> option of Vports in the command line mode.
- you could achieve the same results by typing a hyphen before typing VPORTS on the command line (i.e. –VPORTS ).

The Viewports toolbar is practical to have open when you are creating and managing viewports in paper space.
- this is a fast way to create viewports one-at-a-time.
- you will use it to create a new viewport in the following exercise.
Practice tutorial: creating a simple rectangular viewport in AutoCAD
- Continue from the last exercise.
- Right-click on ANY toolbar to invoke a shortcut and select Viewports (if it is not already checked).

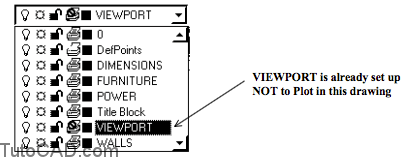
3- Make VIEWPORT the current Layer by selecting it in the Object Property layer control drop down list.
![]() Single Viewport
Single Viewport
4- Pick the Single Viewport button (second from left end) of the Viewports toolbar to create a new rectangular viewport. Then pick two corner points by eye near P1 and P2. The Viewports toolbar should be Scale to Fit for now.
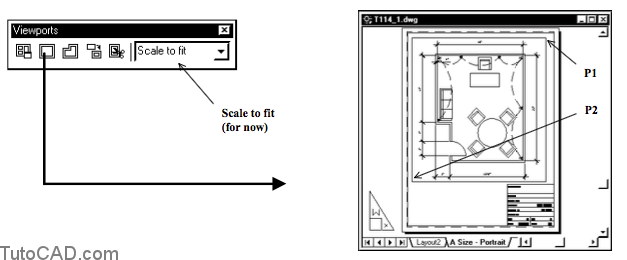
5- Double-click inside the new viewport you just created on the A Size – Portrait layout to switch to the MODEL. Observe the Viewports toolbar again.
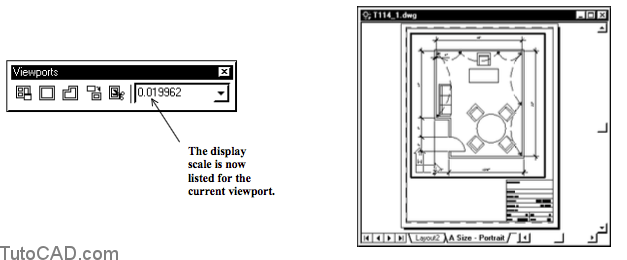
Your viewport toolbar should now show the display magnification of the current viewport in the drop down list.
– it will probably be different than the one shown above because you picked the viewport corners by eye.
– the viewport display was set to use Scale to fit.
6- Pick File + Save to update your changes to T114_1.dwg and prepare for the next exercise.