Managing Image Paths
Image objects are like Xrefs because they will not display in a drawing unless AutoCAD can load the associated external files.
- however, unlike Xref drawing files, an Image file can never be permanently bound inside a host drawing file.
- if AutoCAD does not find an image file, the image object(s) in the drawing is replaced by the image file name as a text label.
You have the option of selecting Retain Path when you attach a new Image file to the current drawing file.
- if Retain path is checked AutoCAD always looks in same specific location whenever you Open the host drawing.
- if your folder structure (names & locations) will never change you may want to retain all image file paths.
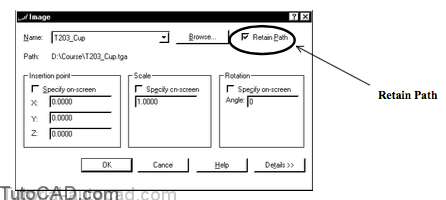
If Retain path is unchecked AutoCAD will systematically look for Image files in appropriate locations when you Open a drawing.
- if the image file path is not retained, AutoCAD looks for image files in the same folder as the drawing that references the image.
- so you can store all of your image files in the same folders as the drawing files that they are attached to.
- when you use this approach you can easily move all files to new folders without having to worry about image paths.
- this is a simple way to make sure your image files will always be found when you open drawings that reference image files.
You can also save a PROJECTNAME (in each drawing file) that points to a specific list of paths in which to look for image files.
- this is the same system variable used to manage Xref paths.
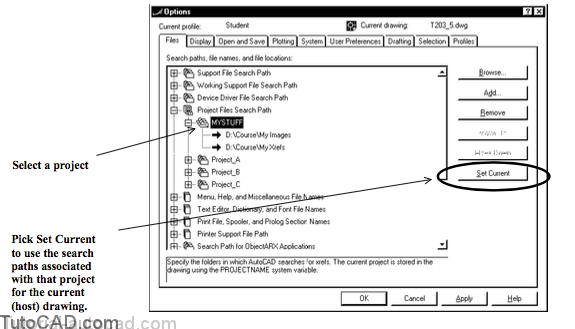
Use Options and select the Files tab to manage project names and associated paths under the Project Files Search Path.
- you can select Project Files Search Path and pick Add to create new projects (type a name for the new project).
- select the desired project and pick Add to add one or more search paths & pick Browse to select paths on your system.
You must select a Project and pick the Set Current button to use the paths associated with the selected project in the current drawing
- the project name is stored in the PROJECTNAME system variable and this is saved in the current drawing.
- paths for each project are saved in the system registry.
When you use project names to manage Image & Xref file paths you can distribute drawings to others with minimal effort.
- users (on other systems) can store Xref & Image files in the folders of their choice on their systems.
- then they can use Options to define projects with the same project name but select new paths on their system.
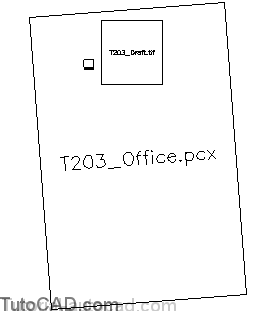
Images cannot be displayed if AutoCAD does not find the associated image files when you Open a drawing.
- you are not warned but a text label (the image file name) takes the place of the missing image object in the drawing.
- the image frame is also displayed if frames are turned on.
Use the Image Manager to Browse for missing image files.
- select an Image with a Not Found Status and then pick the Browse button to look for and select an image file to use.

You can delete paths if image files & drawings are in the same folder & you originally checked Retain Path when you attached the image.
- invoke the Image Manager.
- select the Image & delete the path prefix (leaving the image file name) in the Image Found At box & pick the Save Path button.
PRACTICE WORKING WITH IMAGE PATHS
- Close all drawings from previous exercises.
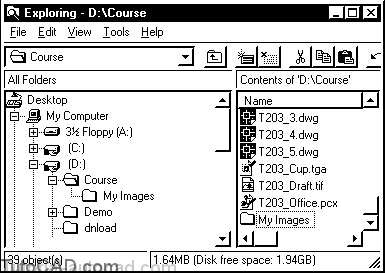
- Launch Windows Explorer (if it is not already running) and navigate to your personal folder (the illustrations show this folder to be D:\Course).
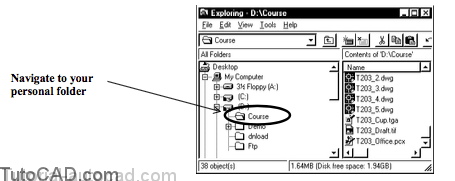
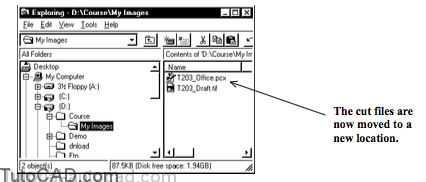
3) From Windows Explorer, pick File + New and select Folder. Call this new folder My Images.
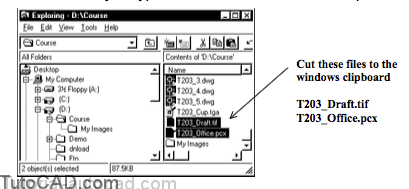
4) Press & hold <Ctrl> while you select the T203_Draft.tif and T203_Office.pcx files on the right side. Then press & hold <Ctrl> while you type X to cut these files to the clipboard.
5) Select the My Images folder under your personal folder on the left side of Windows Explorer. Then press & hold <Ctrl> while you type V to paste these files into this new folder.
6) Switch back to the AutoCAD window.
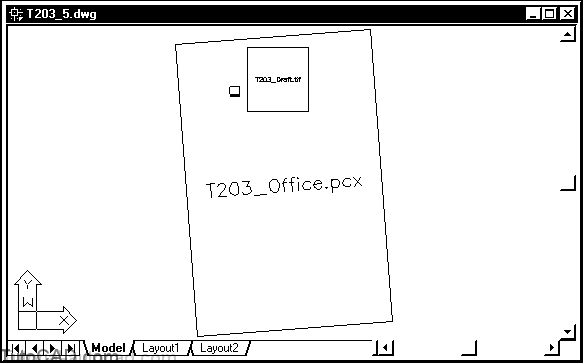
7)Open the T203_5.dwg drawing in your personal folder.
8) Press F2 to check the command line history and then press F2 again to switch back to the AutoCAD drawing window.
This drawing references the two image files that you moved to a new location (the My Images folder) in the previous steps.
- Retain Path was unchecked when the images were attached so AutoCAD looks in the same folder as the drawing for these files.AutoCAD does not warn you that the image files were missing.
- you see only the image frames and the file name for each missing image in the drawing.9) Pick Insert + Image Manager. Select the T203_Draft image and pick the Browse button. Navigate to the My Images folder under your personal folder. Select the T203_Draft.tif file and pick the Open button there to return. Then pick OK to exit the Image command.
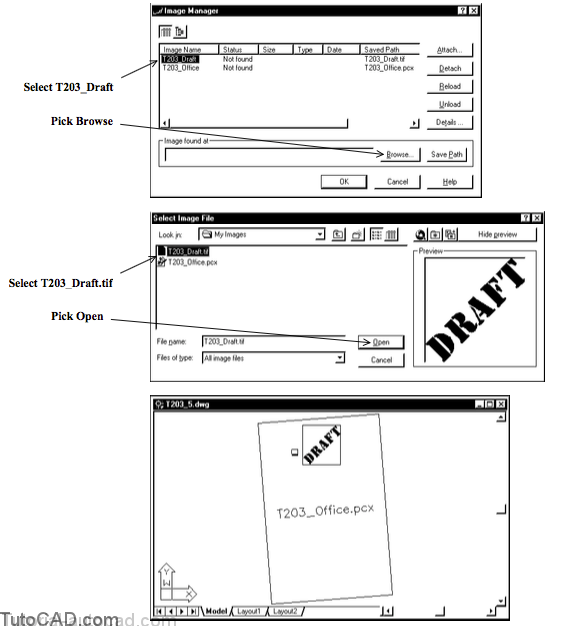
- You replaced the missing image file with the image in the new folder.
you could have selected any file but in this case you simply selected the same file (which was moved to a new location) - the image object now appears in the current drawing.