How to manage Xref Paths
You have the option of selecting Retain Path when you attach a new Xref to the current drawing.
- if Retain Path is checked AutoCAD retains the complete path of the Xref & looks in this location each time it loads the Xref file.
- if your folder structure (names & locations) will never change you may want to retain all Xref paths.
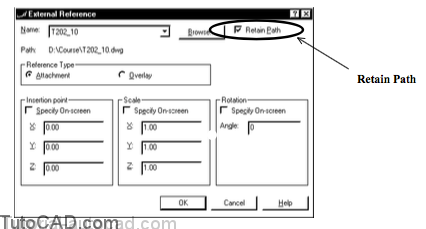
Paths can change for minor administrative reasons and it may be impractical to retain paths if you expect them to change later on.
- for example, drive letters can change in a network environment when you re-map your network
- or you may want to move completed project files to a special archive location at the end of a project.
If Retain Path is unchecked AutoCAD will systematically look for Xref files in appropriate locations when you Open the host.
- one approach is to store all Xref drawing files in the same folder as the host drawings that reference them.
- when you place all Xref drawings in the same folder as the host drawings it is easier to move all files to new folders later on.
- this is a simple way to make sure reference files will always be found when you open host drawings.
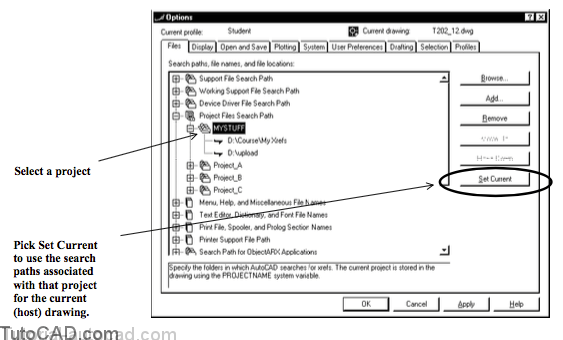
You can also save a PROJECTNAME in each host file that points to a specific list of paths in which to look for Xrefs (for that host file).
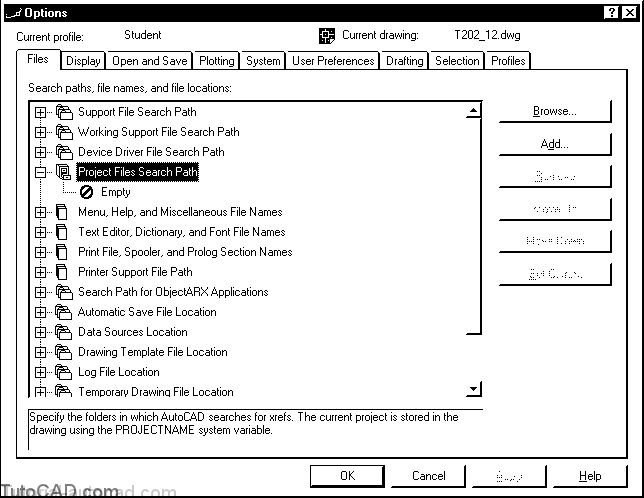
- use Options and select the Files tab to manage project names and associated paths under the Project Files Search Path.
- you can select Project Files Serach Path and pick Add to create new projects (type a name for the new project).
- select the desired project and pick Add to add one or more search paths & pick Browse to select paths on your system.
You must select a Project and pick the Set Current button to use the paths associated with the selected project in the current drawing
- the project name is stored in the PROJECTNAME system variable and this is saved in the current drawing.
- paths for each project are saved in the system registry.
When you use project names to manage Xref paths you can distribute drawings to others with minimal effort.
- users (on other systems) can store Xrefs in the folders of their choice on their systems.
- then they can use Options to define projects with the same project name but select new paths on their system.
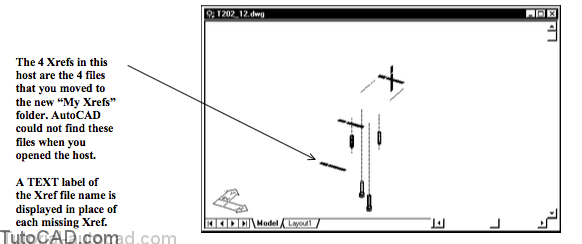
Objects saved in missing Xrefs are not displayed if AutoCAD cannot find Xref drawing files when you Open a host drawing,
- a text label (the Xref drawing file name) takes the place of the missing Xref in the drawing.
- you will also see a message on the command line that resembles the following example.
Resolve Xref “T202_5”: T202_5.dwg
Can’t find T202_5.dwg
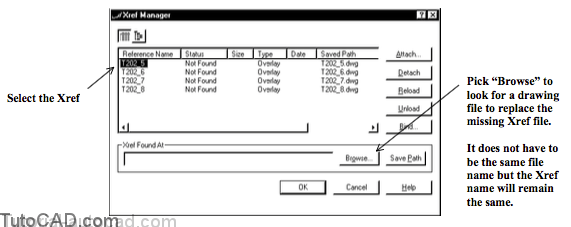
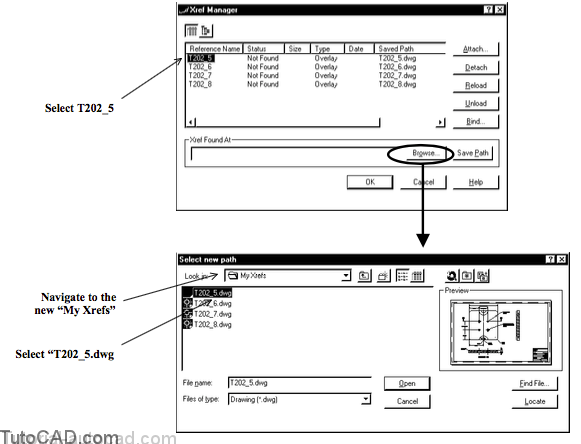
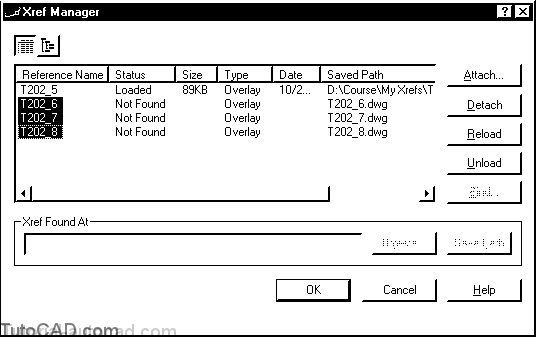
Use the Xref Manager to Browse for missing Xref drawings
- select an Xref with a Not Found Status and then pick theBrowse button to select a drawing file to use.
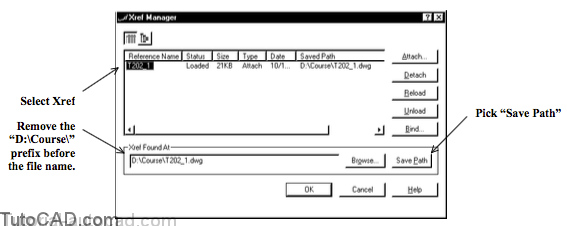
You can delete paths if Xrefs & hosts are in the same location and you originally checked Retain Path when you attached the Xrefs.
- select the Xref & delete the path prefix (leaving the file name) in the Xref Found At box then pick the Save Path button.
PRACTICE WORKING WITH XREF PATHS
1) Close all drawings from the previous exercise.
»2) Open the T202_12.dwg drawing in your personal folder.
»3) Pick View + Hide.

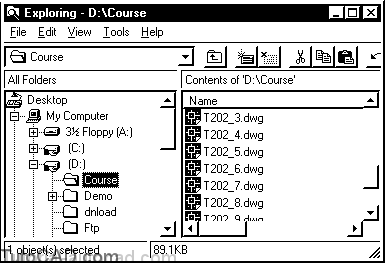
4) Launch Windows Explorer (if it is not already running) and navigate to your personal folder (the illustrations show this folder to be D:\Course).
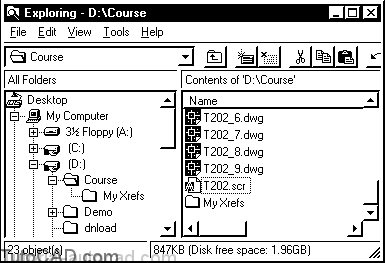
5) From Windows Explorer, pick File + New and select Folder. Call this new folder My Xrefs.
6) Switch back to AutoCAD and Close the current drawing without saving any changes.
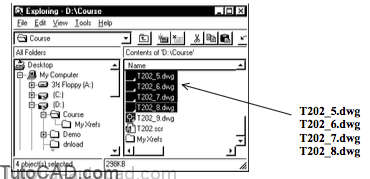
7) Switch back to Windows Explorer. Select the four drawings shown below. Press and hold <Ctrl> then press X to cut these drawings to the clipboard.
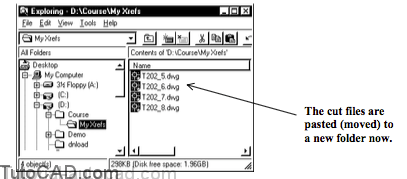
8) Select the My Xrefs folder on the left side of Explorer. Press and hold <Ctrl> then press V to paste the cut drawing files into this new folder.
9) Switch back to AutoCAD and Open the T202_12.dwg in your personal folder again.
10) Press F2 to switch to the Text Window and observe the command line history. Then press F2 to return to the AutoCAD Window again.
Opening an AutoCAD 2000 format file.
Resolve Xref “T202_5”: T202_5.dwg Can’t find T202_5.dwg
Resolve Xref “T202_6”: T202_6.dwg Can’t find T202_6.dwg
Resolve Xref “T202_7”: T202_7.dwg Can’t find T202_7.dwg
Resolve Xref “T202_8”: T202_8.dwg
Can’t find T202_8.dwg
Regenerating model.
11)Pick Insert + Xref Manager. Select the T202_5 Xref then pick the Browse button. Navigate to the new My Xrefs folder under your Personal folder and select the T202_5.dwg file there. Then pick Open to return to the Xref Manager and pick OK to exit Xref.
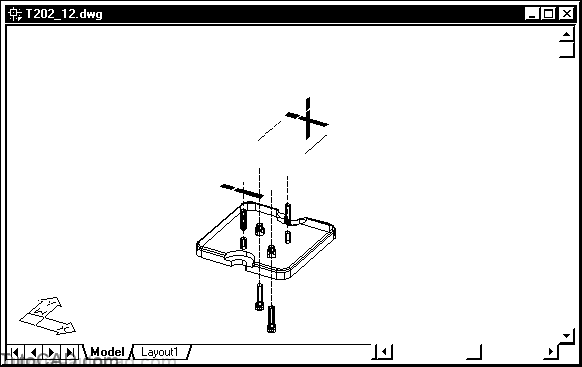
Now the host can find one of the missing Xref drawing files and the objects saved in that Xref appear in the host.
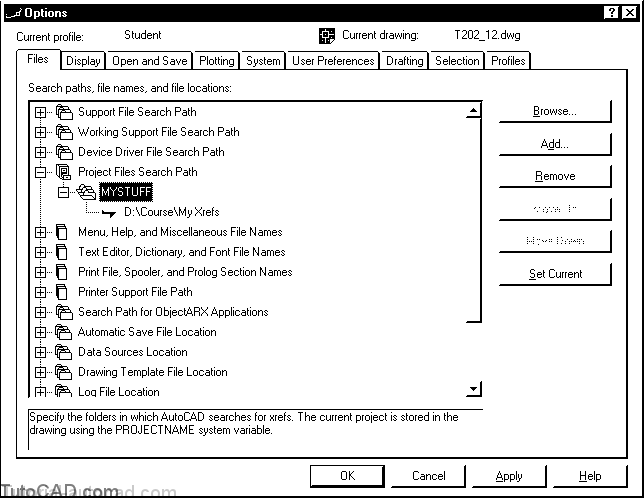
12) Pick Tools + Options. Select the File tab and expand the Project Files Search Path. It may be Empty as shown below. (If there is already a project called MYSTUFF, select this project and pick the Remove button.) With the Project Files Search Path selected, pick the Add button & type MYSTUFF as the new project name.
You just created a new project called MYSTUFF but at the moment there are no paths saved for this project.
13) Select the new MYSTUFF project and pick the Add button. Then pick the Browse button and navigate to the new My Xrefs folder under your personal folder. Pick OK to return to the Options box. Select MYSTUFF again and then pick the Set Current button to assign this project to the current drawing. Pick OK to exit Options.
When you select a project and pick the Set Current button you are saving the name of the selected project in the current drawing
- this project name is saved in the PROJECTNAME system variable in the current (host) drawing file.
- each host can have a different project name.
The paths that you associate to project names in the Options box are saved in your system registry.
- you can change them at any time using the Options command.
In the next step you will force AutoCAD to reload the missing Xrefs by using the Xref Manager.
- AutoCAD will look for any Xrefs in the specified search paths if it cannot find them in the current folder.
14) Pick Insert + Xref Manager. Press the <Shift> key while you select the other 3 Xrefs that are Not Found. Then pick the Reload button & pick OK.
15) Pick View + Hide.
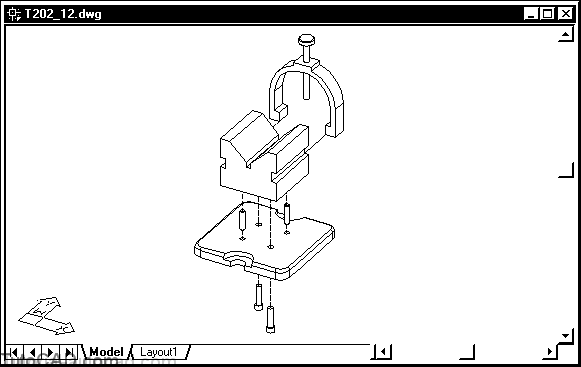
AutoCAD is now able to find the Xref files in your search path and all Xrefs should be visible in this host.
16) Save changes to the current drawing then Close the file.
17)Switch back to the Windows Explorer and move the same four files (see page 38) from the My Xrefs folder back to your personal folder. You will need these files again in other exercises later on. Then switch back to AutoCAD.