How to save & Restore settings
Free lesson how to save & Restore plot settings in AutoCAD
You will probably work with only a few combinations of sheet sizes and drawing scales if you are like most other AutoCAD users.
- you can increase your productivity in AutoCAD by saving and restoring your common page setups by name.
- you can then import named page setups that are saved in other drawings without having to open those drawings.

Practice tutorial: saving and restoring plot settings in AutoCAD
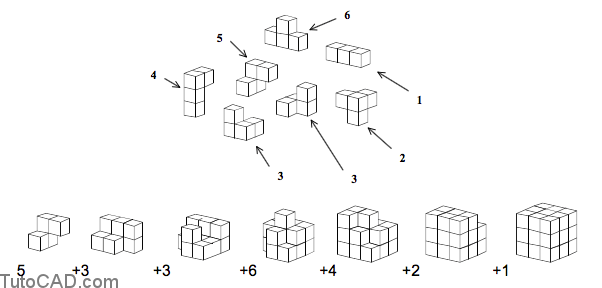
In this exercise you will work with 6 simple drawing files which document the 6 unique pieces of the 3D puzzle below.
- the progressive steps required to “solve” this puzzle (and make a cube) is also shown.
The simple 2D drawings for this puzzle have already been created
but you must use Page Setup to prepare these drawings to Plot.
- the first three drawings will be set up to Plot from the Model and
the other drawings will be set up to Plot from Layout1.

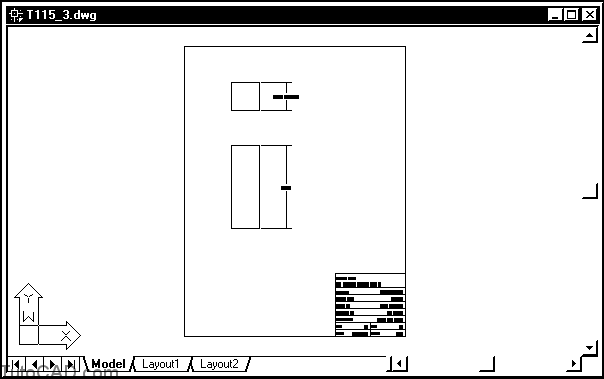
1- Open the T115_3.dwg drawing in your personal folder.
2- Right-click on the Model tab and select Page Setup from the shortcut menu. Select HP LaserJet.pc3 as the Name (or the name your instructor tells you to use) on the Plot Device tab. On the Layout Settings tab make the following changes and then pick OK.

In the next step you will verify that you have set up this Model page for plotting correctly by using the Preview command.
- if the preview is not correct you can return to this step to adjust the setup appropriately.
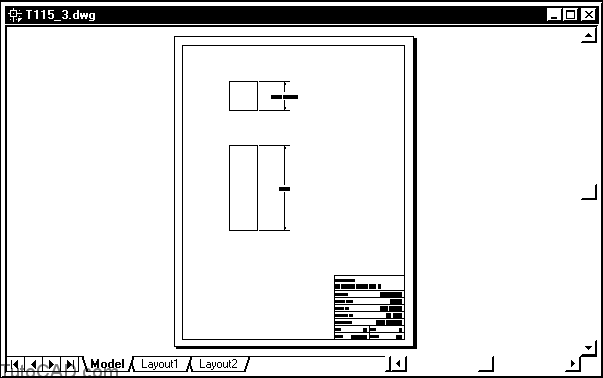
3- Pick File + Plot Preview and then press <enter>. If your preview resembles the illustration below then go to the next step. Otherwise, repeat the last two steps.
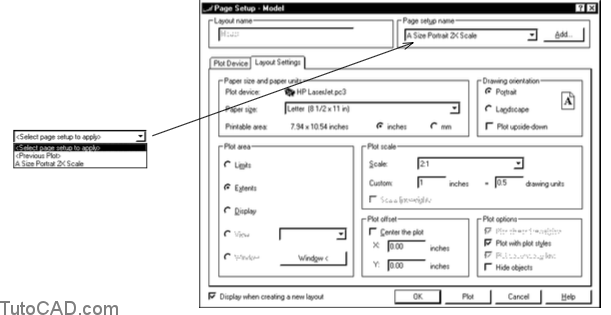
4- Right-click on the Model tab to invoke a shortcut and select Page Setup. Then pick the Add button in the Page setup name to continue.

5- Enter A Size Portrait 2X Scale as the New page setup name and pick OK to return to the Page Setup dialogue box. Then pick OK to complete the setup.
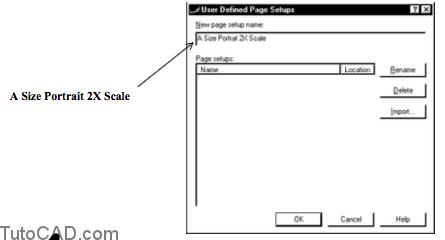
You can save the current Page Setup with a specified name and it will be available to restore in the Page setup name drop-down list.
6- Pick File + Save to save these changes to T115_3.dwg.
7- Pick File + Close to close the active drawing.
8- Open the T115_4.dwg drawing file in your personal folder.
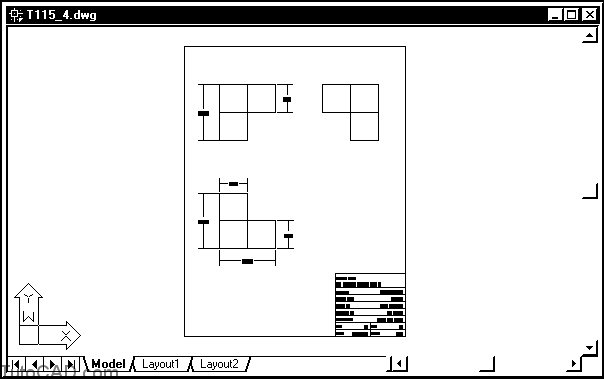
9- Right-click on the Model tab to invoke a shortcut and select Page Setup. Note how this drawing has NOT been set up to Plot from the Model tab yet. Then pick the Add button in the Page setup name area to continue.
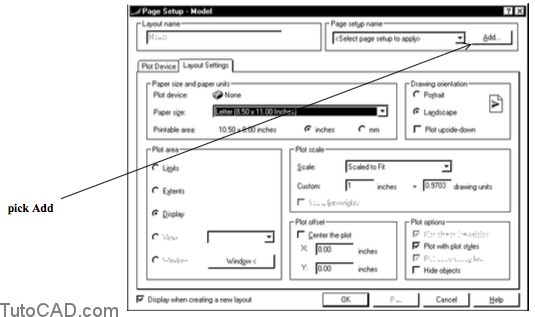
There is no Plot device assigned to the Model page setup yet, the plot scale is Scaled to Fit and several other changes must be made
- this drawing should use the same plot settings as the previous drawing and in the next few steps you will import these settings.
10- Pick the Import button then select the T115_3.dwg in your personal folder and pick the Open button there.
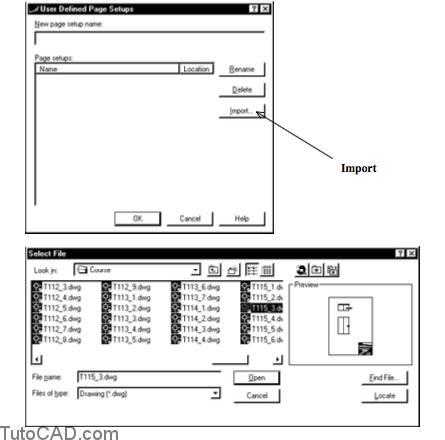
11- Select the A Size Portrait 2X Scale page setup that you created in this drawing and pick OK to continue.

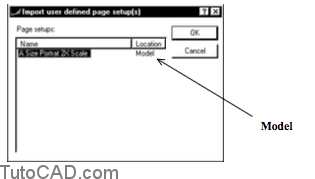
You see that the location for this setup is Model
- which will remind you that this page setup was created for the Model tab (rather than for a Layout in paper space).
12- Pick OK when you return to the User Defined Page Setups dialogue box and this will return you to the Page Setup dialogue box.

13- Click in the Page setup name drop down list and select this A Size Portrait 2X Scale page setup which is now saved in the active drawing. Note how all the settings are now appropriate to Plot and then pick OK.
You set up this layout for plotting exactly like the other drawing that you manually set up at the start of this exercise.
- the steps were broken down to make it easier for you (the first time) which makes this task seem like more work than it really is.
14- Pick File + Plot Preview then press <enter> to continue.

15- Set up the Model for plotting in the T115_5.dwg file in your personal folder using a similar technique.

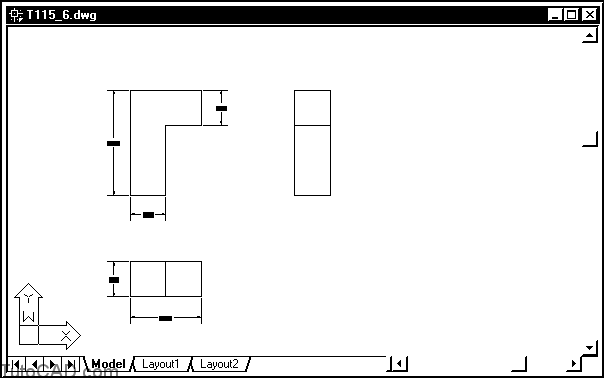
16- Open the T115_6.dwg in your personal folder.
This drawing will be set up to plot from Layout1.
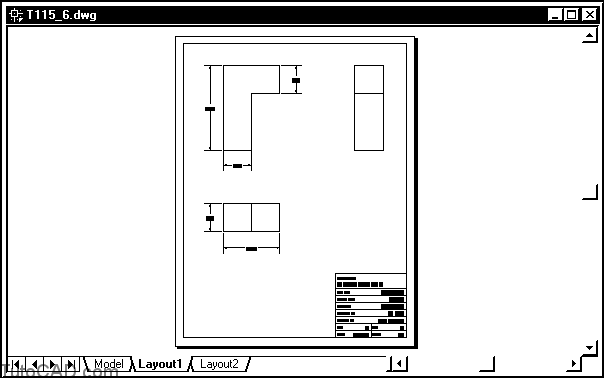
17- Left-click on Layout1 to make it current then right-click on Layout1 to select Page Setup from a shortcut. Select the HP LaserJet.pc3 device (or equivalent). Plot scale should be 1:1 and the page orientation should be Portrait. Plot area should be the Extents and you should Center the Plot. Use the Letter page size. Preview the plot.
More practice?
18- Save this page setup as A Size Portrait Layout and Save the changes to the T115_6.dwg drawing file.
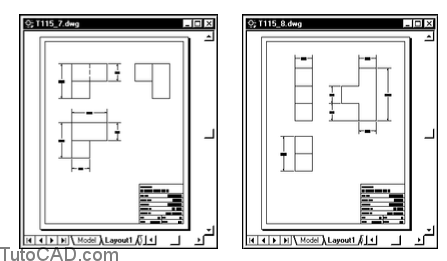
19- Open the T115_7.dwg & T115_8.dwg drawings in your personal folder. Use Page Setup on Layout1 in both of these drawings and Import the A Size Portrait Layout from the T115_6.dwg (that you just saved in the previous step). Use this page setup on these layouts & Preview the plots of Layout1 for both the T115_7.dwg & T115_8.dwg drawings.