Transparency & Display Order
While display order is normally not an issue for most AutoCAD objects, it can be very important when you work with images.
- for example, the background in a raster image could block out parts of a vector drawing if the image is above the vector objects.
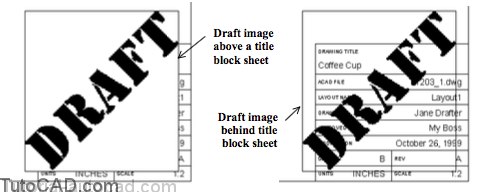
Younger objects normally display & Plot on top of older objects but you can use the Draworder command to change this display order.
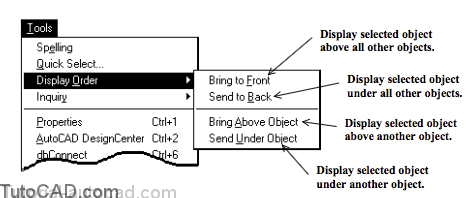
- the four self-explanatory options are described for the pulldown menu illustration below.
It may seem that images float to the top after you edit them.
- however, all objects should revert back to your specified order after a regeneration or when you Plot (or if you force a Regen).
- use AutoCAD Help to learn how the SORTENTS system variable can effect the display order of objects.
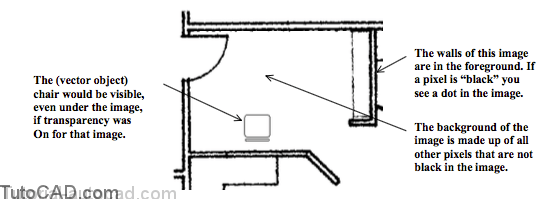
You can make the background transparent in bitonal images (i.e. raster image files set up using a one bit per pixel format)
- pixels in a bitonal image can have only two possible settings, such as black or white.
- you can also refer to the foreground (black) color or the background (white) color in bitonal images.
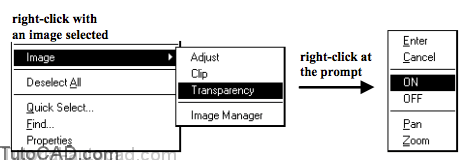
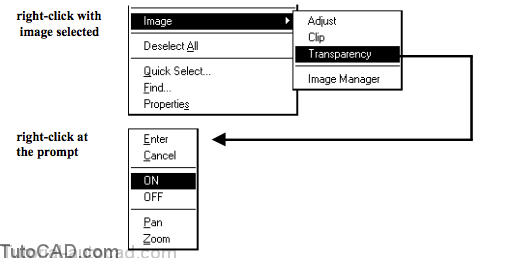
Use the Transparency command and select the frame of an image object to change the transparency setting for that image.
- then type the entire word ON or OFF or right-click in the drawing area and select the desired setting from a shortcut.
- transparency is OFF by default.
When you combine vector objects with bitonal images you may
want to turn transparency On for these images.
- then you will not have to worry about some vector objects ending up being obscured by the background of a scanned image.
- for example, a chair block could be visible under a scanned image of a floor plan if the image background was transparent.
You can also select an image frame when no other command is running and right-click in the drawing area to invoke a shortcut.
- pick Image then Transparency & right-click in the drawing area again to invoke another shortcut & select ON or OFF.
PRACTICE WITH DISPLAY ORDER AND IMAGE TRANSPARENCY
1) Open the T203_3.dwg drawing in your personal folder
(or open the drawing from the last exercise if you completed that exercise).
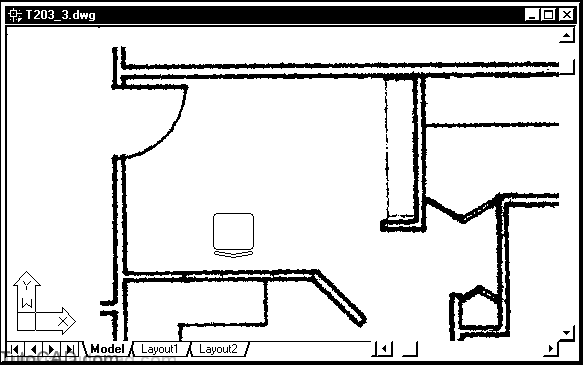
2) Pick Tools + Display Order + Send to Back. Select the Chair object and press <enter> to continue.
The floor plan image attached to this drawing is a bitonal image but transparency is turned Off (by default when you attach an image).
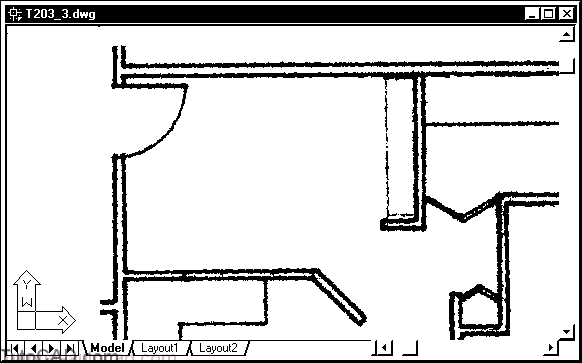
- the chair disappeared when you moved this object underneath all other objects (in this case the only other object is the image).
- you could avoid this problem by turning transparency on for this image object.
3)Pick View + Zoom + Extents.
4) Pick Modify + Object + Image + Frame. Right-click in the drawing area to invoke a shortcut and select ON.
5) Select the frame of this image object when no other command is running. Right-click in the drawing area to invoke a shortcut and pick Image + Transparency. Then right-click in the drawing again to invoke another shortcut and pick ON to turn transparency on for this image.
6) Pick View + Zoom + Previous to see just the room again.
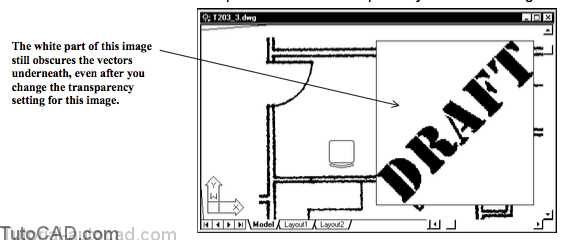
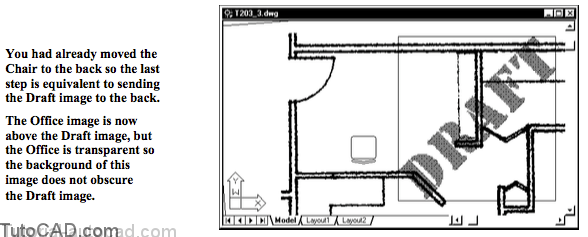
The chair should be visible again (even though it is under the image) because the background of this image is transparent.
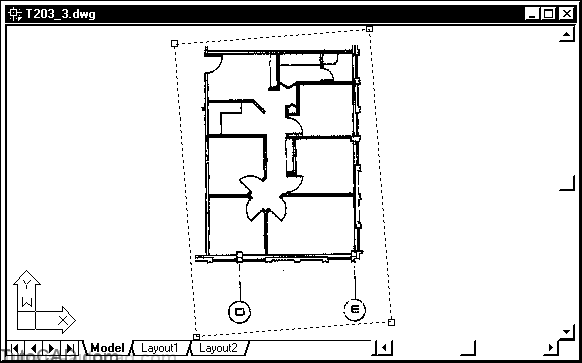
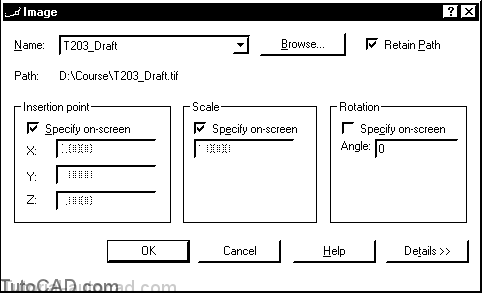
7) Pick Insert + Raster Image. Select T203_Draft.tif in your personal folder. Pick Open there to continue.

8) The first two Specify on-screen boxes should be checked. Then pick OK to continue.
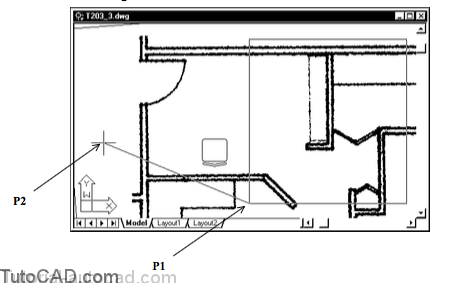
9) Pick near P1 then move your crosshairs near P2 so the image frame is approximately as shown. Left-click to insert the image.
10) Select the frame of this new image object when no other command is running. Right-click in the drawing area to invoke a shortcut and pick Image + Transparency. Then right-click in the drawing again to invoke another shortcut and pick ON to turn transparency on for this image
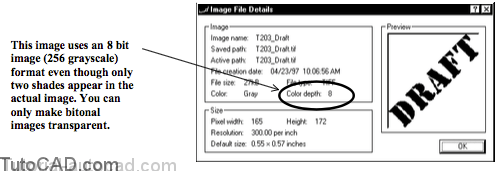
11) Pick Insert + Image Manager. Select the T203_Draft image and pick the Details button to continue.
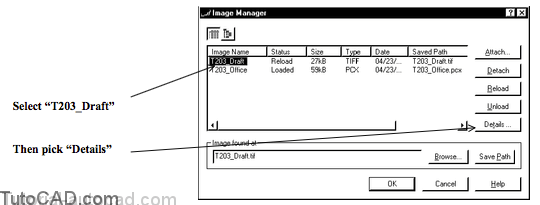
12) Read the information in this box and pick OK to return to the previous box and pick OK to exit the Image command.
13) Pick Tools + Display Order + Send Under Object. Select the Draft image frame and press <enter> to continue. Then select the chair as the reference object.
14) Pick View + Zoom + Extents.
15) Select the frame of the Office image & select FURNITUREin the layer list. Press <Esc> twice to clear the grips.
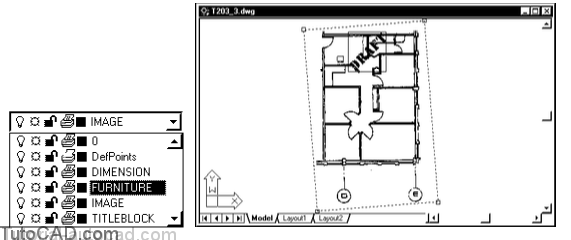
Bitonal images inherit the color of the current layer so the walls should now be red.
- non-bitonal images are unaffected by the color of the current layer (except for the color of the image frame).
16) Save the changes of this drawing and Close the file.