how to use Styles In Other Drawings
Free AutoCAD lesson: how to use Styles In Other Drawings
You should include all dimension styles that you plan to use regularly in your custom template files
- so when you begin New drawings from a template these dimension styles are readily available in the current drawing.
If the desired dimension style is not saved in the current drawing there are two easy ways to import styles from another drawing.
- if the source drawing (the one with the desired style) is open you can use the Matchprop command.
- you can also use AutoCAD DesignCenter to import the style and the source drawing can be open or closed.

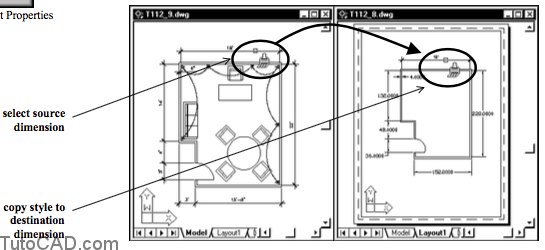
Invoke Matchprop when the source drawing is the active drawing and select a dimension that uses the desired dimension style.
- make the destination drawing the active drawing.
- select dimensions for which you want to apply the dimension style of the selected source dimension.
- the desired dimension style is imported into the destination file and the selected dimensions are updated (in one step).
You have already seen how DesignCenter can be used to drag & drop blocks (defined in other drawings) into the active drawing.
- you can also import any dimension style stored in any drawing into the active drawing using DesignCenter
- so even if you do NOT begin a New drawing from a custom template, you can still use your custom dimension styles.
- you do not have to open the (source) drawing to import the dimension styles stored there.
Practice using AutoCAD dimension styles saved in other drawings tutorial
1- Close the drawing from the previous exercise if it is open.
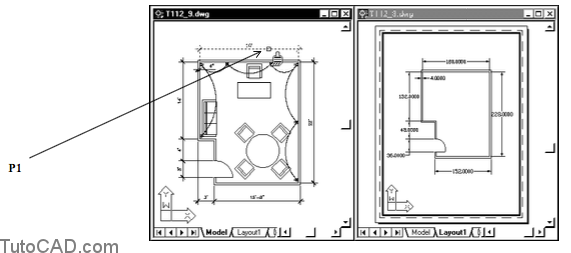
2- Open both T112_8.dwg and T112_9.dwg in your personal folder. Make T112_9.dwg the active drawing and then pick Window + Tile Vertically to see both windows as shown.
3- Pick Modify + Match Properties. Select the dimension shown below near P1 as the source object.
You can right-click for a shortcut and pick Settings to select the desired properties to copy.
- for example, if you do not want the Layer properties to be copied you could uncheck the Layer box in Settings.
- Dimension must be checked to copy a dimension style.
4- Make the T112_8.dwg drawing the active drawing (left-click once in this window).
5- Select the dimension near P1 as the destination object and press <enter> to terminate the Matchprop command.
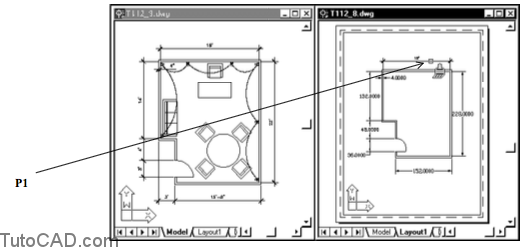
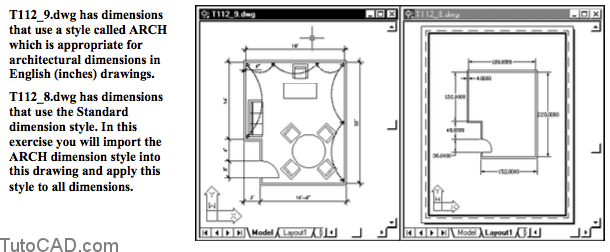
The selected dimension is now updated to use the ARCH dimension style that was imported from the other drawing
- and the ARCH dimension style is now saved in this drawing.
You could have selected all dimensions (one at a time) to apply this style to all dimensions in the drawing
- but when there are many dimensions this approach is not as fast as the method that you will use in the next few steps.
6- Right-click in any toolbar to invoke a shortcut and select Dimension (if it is not already checked) to display this toolbar. Select ARCH in the drop-down list to make this the current style. Then close this toolbar by left-clicking on the small x in the upper right corner of this toolbar.

7- Pick Dimension + Update. Enter ALL then press <enter> to update all dimensions in the drawing to use the current dimension style.
Now all dimensions in this drawing use the ARCH style.

8- Save both drawings and close these files.
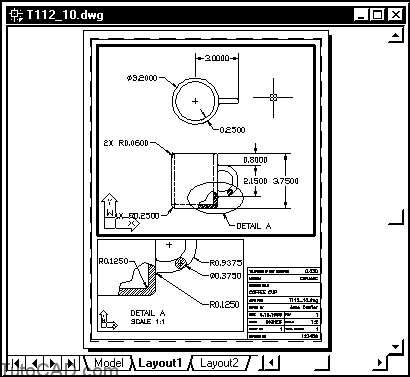
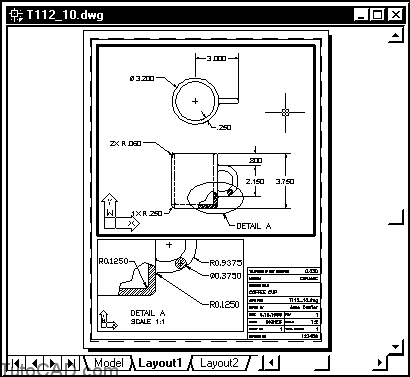
9- Open the T112_10.dwg drawing in your personal folder.
This file has dimensions that use the Standard dimension style.
You will use DesignCenter to import a style called Custom that is stored in the T112_11.dwg. This style is the same as the style that you created from scratch if you completed the exercise that started on page 44.
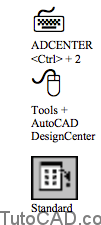
10- Pick Tools + AutoCAD DesignCenter (if DesignCenter is not already open on your screen).
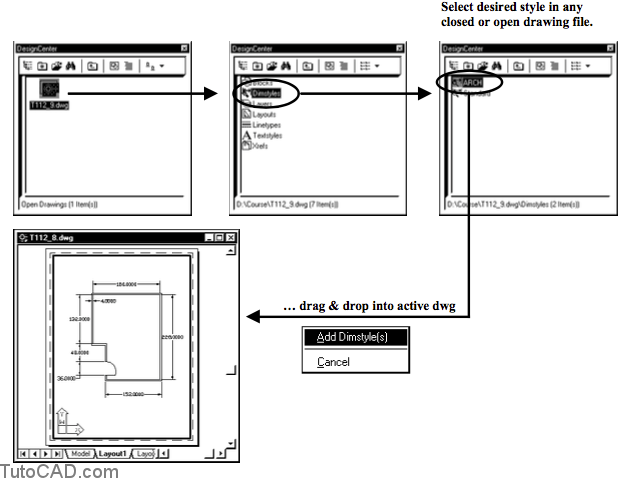
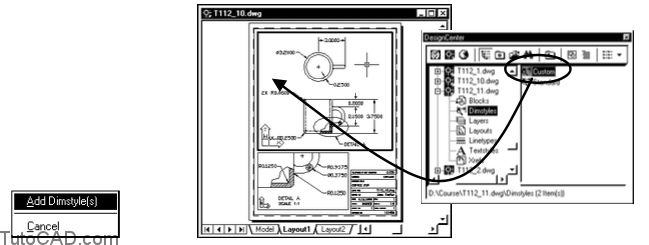
11- Navigate to your personal folder and expand the T112_11.dwg to expose content. Select Dimstyles in the tree view side to display dimension styles in the palette.
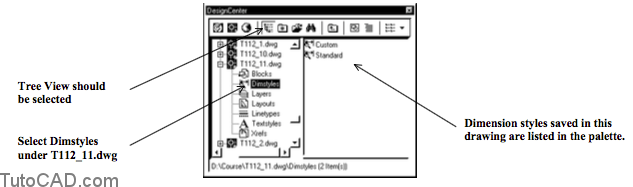
DesignCenter on your system will probably not appear the same as the illustrations in this manual.
- it could be docked on the side of your screen.
- the preview and descriptions areas may be displayed.
- the divisions may be different sizes.
- however, these details are not important provided you can display the dimension styles in the palette.
12- Use your right mouse button to select the Custom dimension style in the palette and drag this style into the active drawing. When you drop this dimension style select Add Dimstyle(s) from the shortcut.
13- Pick Tools + AutoCAD DesignCenter to dismiss DesignCenter.
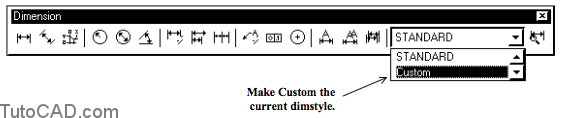
14- Right-click in any toolbar to invoke a shortcut and select Dimension (if it is not already checked) to display this toolbar. Select Custom in the drop-down list to make this the current style. Then close this toolbar by left-clicking on the small x in the upper right corner of this toolbar.
15- Pick Dimension + Update. Select all dimensions in the large viewport and press <enter> to complete the task (you can use an implied Window to select all dimensions).
16- Left-click in the smaller viewport to make this the current viewport and repeat the previous step to update these dimensions as well.

You had to update dimensions in each viewport separately because these viewports use different display magnifications
– and this dimension style is defined such that dimensions are automatically scaled to paper space.
17- Save the changes to this drawing and close the file.