Adjusting Images In AutoCAD
One way to adjust image quality in AutoCAD is to change the Imagequality setting for all images in the current drawing.
Use a draft quality to make images display quickly and use a high quality for optimum display quality.
Command: IMAGEQUALITY ↵
Enter image quality setting [High/Draft] <High>: D ↵
Command:
AutoCAD will always Plot using a high quality regardless of the current setting for Imagequality.
- so if you are not concerned about the quality of images on screen you can improve performance by using a draft quality.
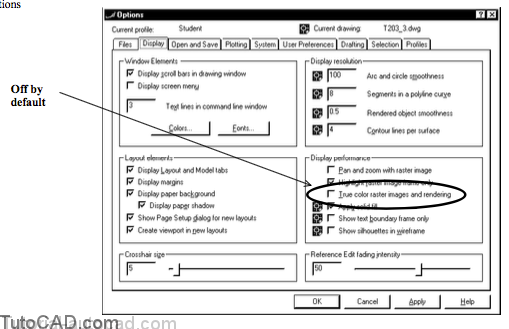
If you have true color (24+ bit) images you can check True color raster images and rendering on the Display tab of the Options box.
- this will maximize the display quality on screen but you may notice an impact on system performance for large images.
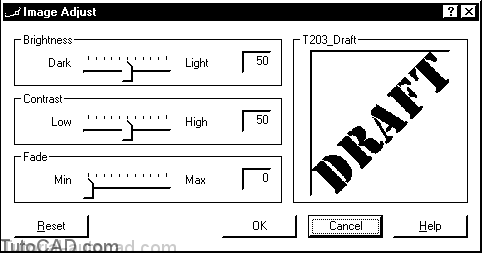
Use Imageadjust to change the way raster images (that are NOT bitonal) display and Plot in AutoCAD.
- adjust brightness to make images lighter or darker.
- adjusting contrast may make poor quality images easier to see.
- adjust fade to change image intensity (e.g. water mark effect).
You are not changing the actual (external) image files when you use the Imageadjust command
- you are only changing the way an image displays and plots inside AutoCAD when you use Imageadjust.
- individual copies (instances) of the same image file can even have different settings in the same drawing.
As with the other image editing commands, you can invoke the Imageadjust command from a shortcut menu.
- select an image object when no other command is running and right-click in the drawing area to invoke a shortcut.
- pick Image + Adjust to invoke Imageadjust for the selected image object.

PRACTICE ADJUSTING IMAGES IN AUTOCAD
- Open the T203_4.dwg drawing in your personal folder.
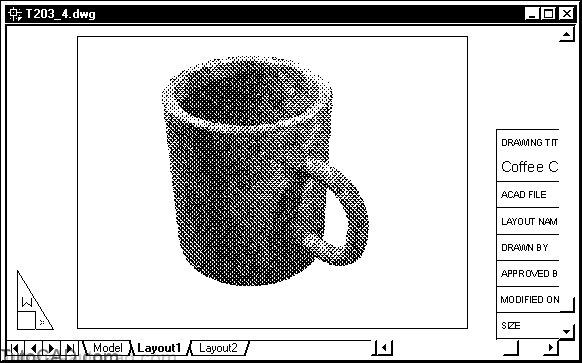
2) Pick Modify + Object + Image + Adjust. Select the Cup image frame and press <enter> to continue.
3) Drag the slider for Brightness slowly all the way to the left and then slowly to the right and observe the effect it has on the image in the preview. (do not pick OK yet)
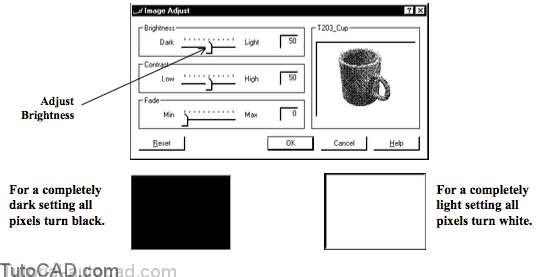
Brightness controls the overall lightness or darkness of an image and you normally only make small adjustments.
4) This time observe the effects of Contrast to the preview pane. (do not pick OK yet)
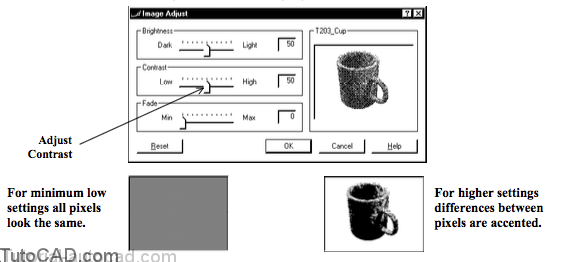
Lower the contrast to minimize the differences between all pixels or increase contrast to emphasize the differences between pixels.
5) Now observe the effects of Fade in the preview pane. Then pick Cancel to exit Imageadjust.

Minimize Fade (default) to maximize an image intensity or increase Fade to reduce the intensity (e.g. make a water mark).
6) Close the current drawing without saving changes.