Creating & Using DWF Files – ePlots
DWF files (ePlots) are special plot files that you can view and printwithout having to use AutoCAD.
- you can distribute plot information to non AutoCAD users
- you can also use ePlots to distribute drawing information without giving full access to the original AutoCAD drawing file.
You create DWF (ePlot) files by selecting the DWF ePlot.pc3 plotter configuration when you Plot.
- you can specify the DWF File name at Plot time and you can even publish the file directly to an internet location.

DWF ePlot.pc3 should already be installed when you install AutoCAD but you can also use Plottermanager to install it.
- double-click on the Add-A-Plotter Wizard and use Autodesk DWF ePlot as the plotter manufacturer.
You must first install WHIP! before you can use the MS Internet Explorer or Netscape web browsers to view & print DWF files.
- WHIP! can be downloaded from the Autodesk web site for free at http://www.autodesk.com/products/whip.
- there is extensive information at the same URL which explains how to create & use DWF files effectively.
- visit this URL periodically to learn about new developments.
You can view & print ePlots from MS Internet Explorer or Netscapein at least four different ways.
- double-click on a DWF file from inside Windows Explorer.
- drag & drop a DWF file (from Windows Explorer) into the web browser window.
- pick File + Open in the web browser & select a DWF file (pick File + Open Page if you use Netscape).
- create and activate a hyperlink to a DWF file from another Windows application.
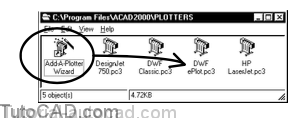
Right-click in your web browser to invoke a shortcut & select Pan or Zoom to use these tools like the realtime versions in AutoCAD.
- you can also select different saved Views to restore and turn Off selected Layers using the same shortcut menu.
The hyperlinks that you create in AutoCAD drawings are present in the corresponding ePlots as well.
- you can even use the right-click WHIP! shortcut to highlight all hyperlinks in the ePlot.
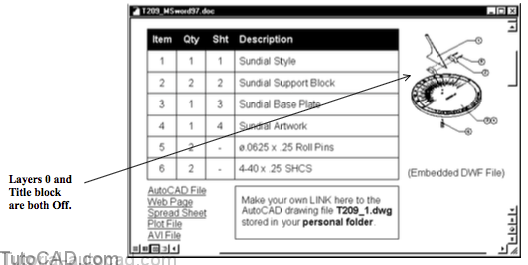
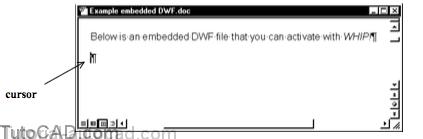
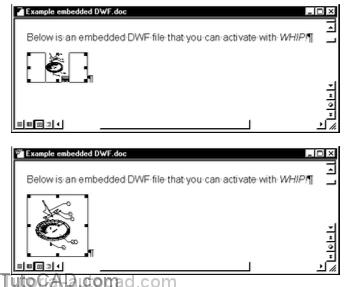
When WHIP! is installed you can embed DWF files in Word or other MS Office documents and distribute these documents to others.
- other users who have also installed WHIP! can double-click in the embedded graphic to activate WHIP!
- and then use right-click shortcut menus to Zoom & Pan or control Layers & Named Views (like inside a web browser).
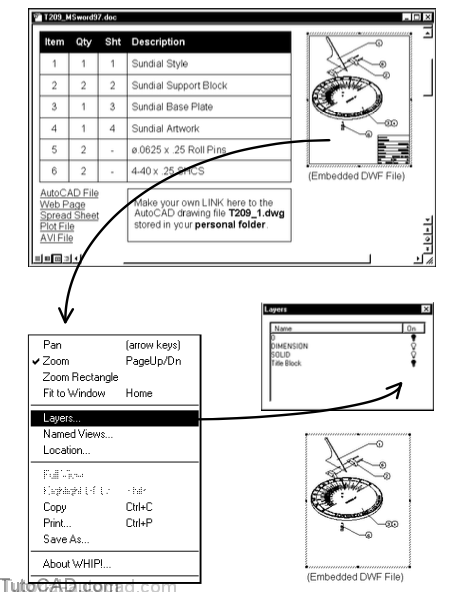
You can embed ePlots in MS Word documents using the following process (if WHIP! has already been installed on your system).
- place your cursor at the desired location in the word file.
- pick Insert + Object and select Autodesk WHIP! Control on the Create New tab then pick OK.
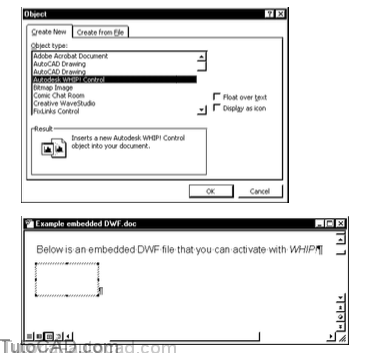
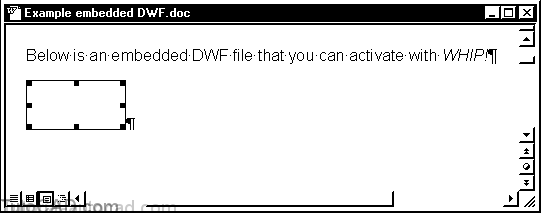
- left-click outside the new frame object (it will disappear) then left-click inside the new frame object to select it as shown.
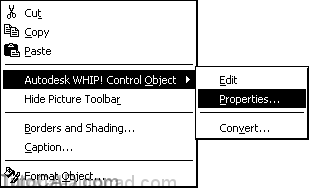
- right-click inside the selected frame object to invoke a shortcut & pick Autodesk WHIP! Control Object + Properties.
- Browse for the desired dwf file to embed & pick OK.
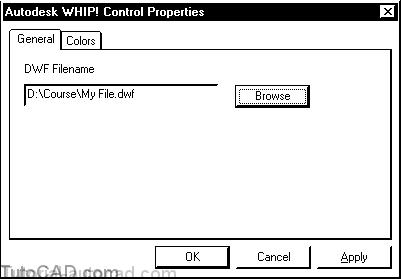
- use the frame grips to resize the frame as required and use the WHIP! right-click shortcut to control the graphics inside.
PRACTICE CREATING AND USING ePLOTS
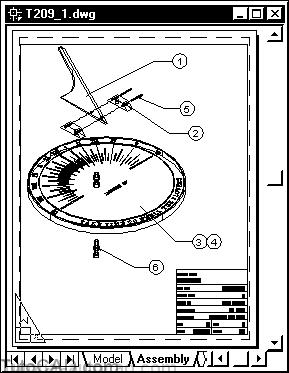
- Continue with the T209_1.dwg from the previous exercise (or Open this drawing again in your personal folder). Make sure Assembly is the current Layout.
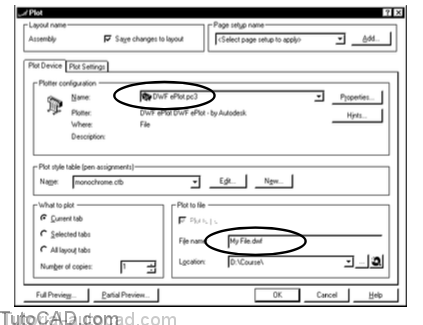
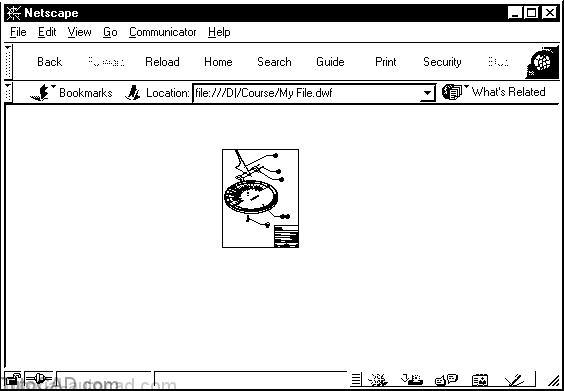
2) Pick File + Plot. Select DWF ePlot.pc3 as the Name for the Plotter configuration on the Plot Device tab. Enter My File.dwf as the File name and select your personal folder as the Location. Then pick OK to create the ePlot file.
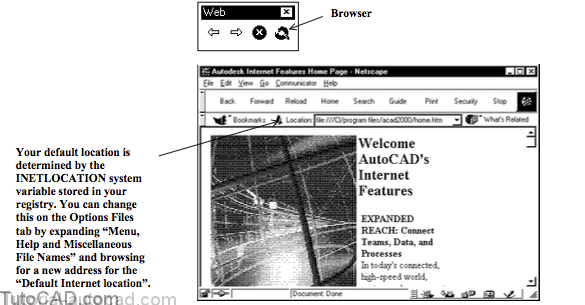
3)Right-click on any toolbar to invoke a shortcut and select Web if this toolbar is not already displayed. Then pick the Browser toolbar button to open the HTML page stored as the default browser location.
4) In your web browser, pick File + Open Page (File + Open if you use MS Internet Explorer). Select the new My File.dwf file in your personal folder. Pick Open there to continue.
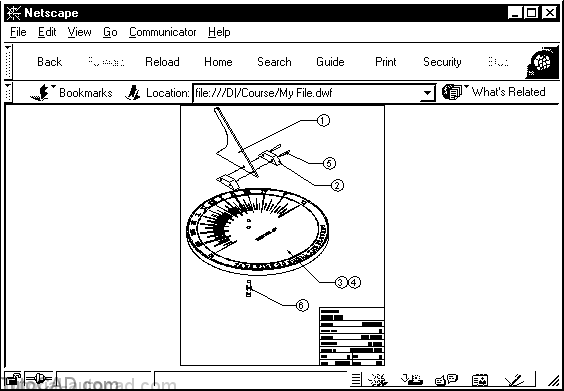
You must change Files of type to All Files (*.*) to see dwf files.
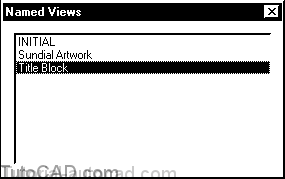
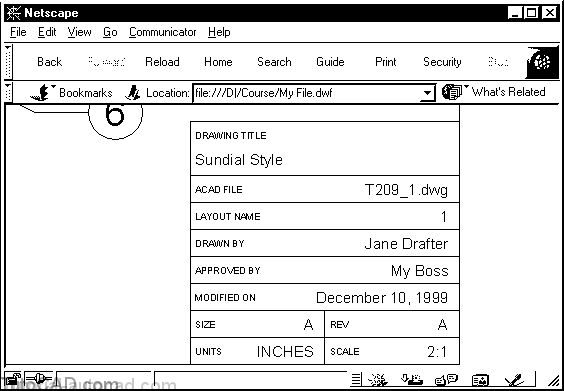
5) Right-click in the browser to invoke the WHIP! shortcut then pick Named Views. Select Title Block then Close that dialogue box.
6) Right-click in the browser again and select Zoom. Drag downward to Zoom out as shown.
The WHIP! Zoom & Pan tools are like Zoom <Realtime> & Pan display tools inside AutoCAD.
More practice?
7) The AutoCAD drawing should already have a hyperlink to T209 Animation.avi if you completed the previous exercise and this hyperlink should be included in your new ePlot file. Activate this hyperlink from the web browser. You may have to click in the browser to start and stop the animation.

8) Close your web browser.
9) Open the T209_MSword97.doc file in MS Word.
10) Double-click in the embedded ePlot in this word file to activate WHIP!. Right-click in the embedded ePlot to invoke a shortcut and pick Layers. Turn 0 and Title block layers Off then Close the Layers dialogue box. Close this doc file without saving changes then Close MS Word.