how to use Crosshatch (Overview)
Free course how to create hatch in AutoCAD (Overview)
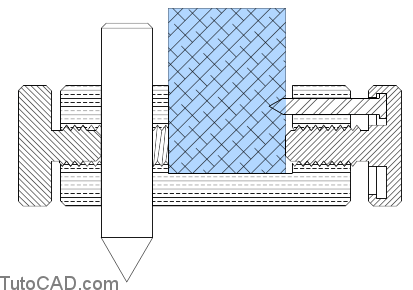
You can create HATCH objects to automatically fill 2D areas with various hatch patterns.
- the most common application involves section views where different hatch patterns represent different parts or materials.
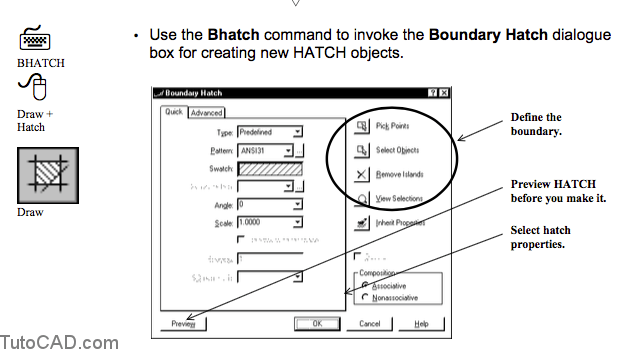
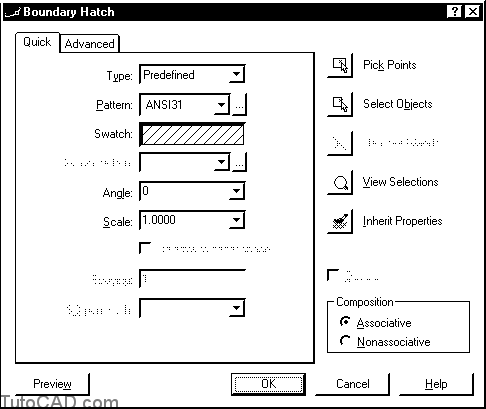
Use the Bhatch command to invoke the Boundary Hatch dialogue box for creating new HATCH objects.
Defining The Boundary
Valid 2D boundary objects include LINEs, ARCs, CIRCLEs, POLYLINEs, SPLINEs, TEXT and MTEXT.
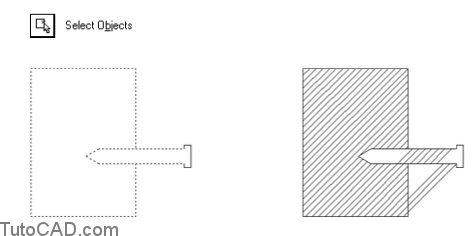
You can specify a hatch boundary in two different ways.
- select objects manually but each boundary object must meet (exactly) end-to-end or there can be hatching errors.
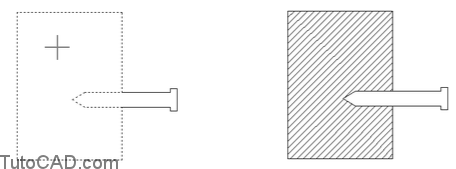
- pick points inside an enclosed 2D area and let AutoCAD determine appropriate boundaries automatically.
![]()
Most crosshatching can be created using the Pick points method.
Default settings create reasonable HATCH objects most of the time when internal islands are automatically detected.
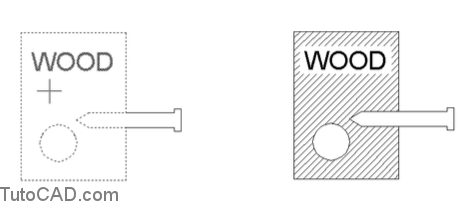
- for example, if you picked an internal point shown below it would detect the TEXT & CIRCLE objects inside the outer boundary.
- hatching is not applied to internal islands by default (on top of the TEXT object or inside the CIRCLE).
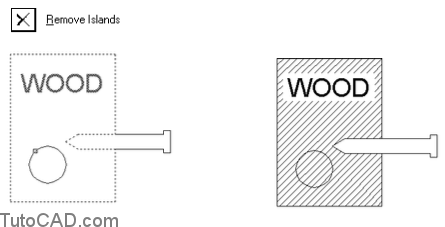
You can manually remove islands if you want AutoCAD to hatch over these detected internal areas.
– for example, you could manually remove the CIRCLE as an internal island to hatch over that area (ignore the CIRCLE).
When you use the Pick Points option you should make sure that all objects in the desired boundary are visible on-screen.
– otherwise AutoCAD may not be able to find the boundary.
When there are many different objects involved in a particular boundary you may lose track of the objects currently selected.
– you can View Selections to highlight the current boundary as a result of your selections or pick points.
![]()
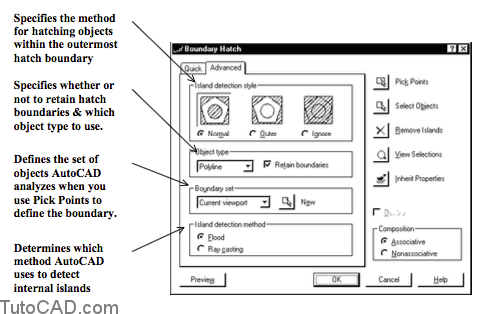
The default settings for Bhatch should produce acceptable results most of the time
– but you can also select different settings for special effects on the Advanced tab of the Boundary Hatch dialogue box.
– for example, you could select Ignore for Island detection style to turn off the automatic island detection feature.
Practice : defining the hatch boundary tutorial in AutoCAD
1- Launch AutoCAD (if it is not already running). Close all open drawings (if there are drawings open).
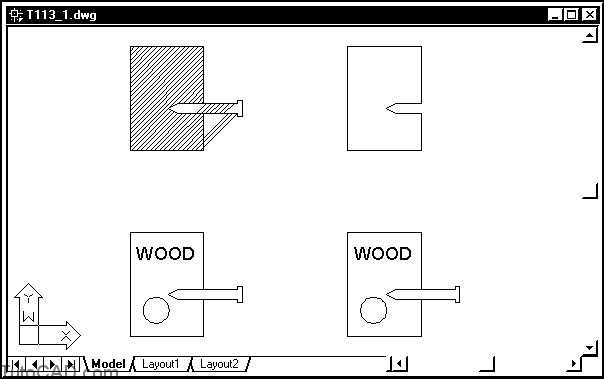
2- Open the T113_1.dwg drawing in your personal folder.
3- Pick Tools + Run Script. Select your personal folder to Look in and select T113.scr as the script File name. Then pick the Open button to run this script. This sets drafting tools to match the behavior described in the exercises.
4- Pick Draw + Hatch & then pick the Select Objects button. Hold your pickbox near P1 so that it is not above any objects then left-click. Move your crosshairs near P2 and left-click to use an implied Crossing tool to select objects for the new HATCH object. Press <enter> to return to the dialogue box.
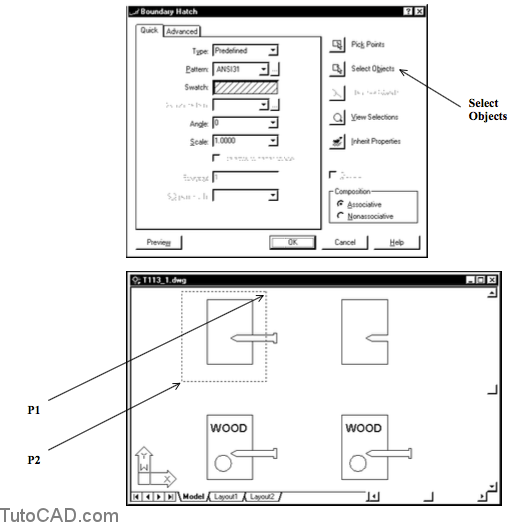
5- Pick the OK button to apply the HATCH using these objects.
The selected objects were not appropriate for a hatch boundary which is the reason for your hatching errors.
– the horizontal (blue) LINEs of the pin extended beyond the rectangular outline.

6- Right-click in the drawing area to invoke a shortcut and select Repeat Hatch.
7- Pick the Select Objects button again and use a similar technique to select objects with the implied Crossing tool shown below. Press <enter> to return to the dialogue box then pick OK to create the new HATCH.
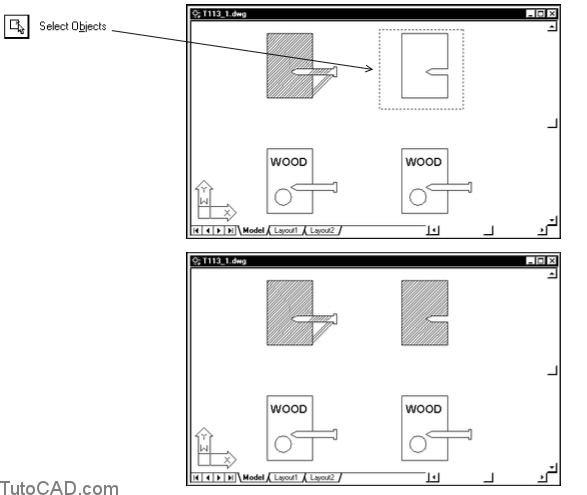
This time boundary objects that you selected formed a valid boundary with no breaks.
– the blue horizontal LINEs of the pin terminated precisely at the rectangular boundary objects.
– there were no hatching errors this time.
8- Right-click in the drawing area to invoke a shortcut and select Repeat Hatch again.
9- This time pick the Pick Points button then left-click near P1 as the internal point. Right-click in the drawing area to invoke another shortcut & select Preview. Then right-click in the drawing area again to return to the dialogue box and pick OK to create the new HATCH object.
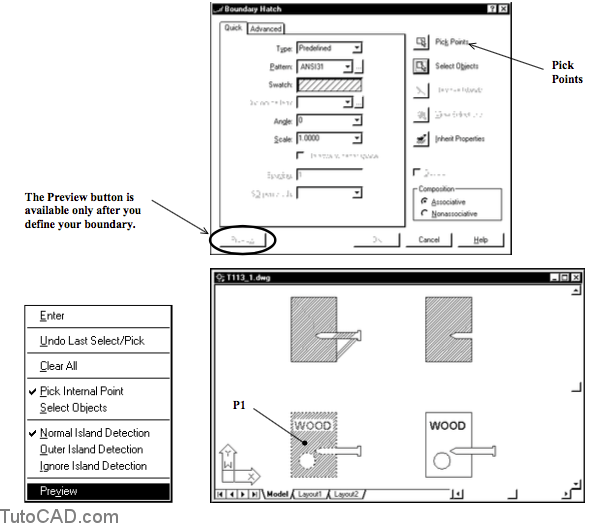
You can Preview hatching (before you pick OK to create it) by picking the Preview button in the Boundary Hatch dialogue box.
– you can also invoke a Preview from the shortcut menu as you did in the last step.
10- Right-click in the drawing area to invoke a shortcut and select Repeat Hatch again
11- Pick the Pick Points button then left-click near P1 as the internal point. Press <enter> to return to the dialogue box. Then pick the Remove Islands button and select the CIRCLE near P2. Press <enter> to return to the dialogue box and pick OK to create the HATCH object.
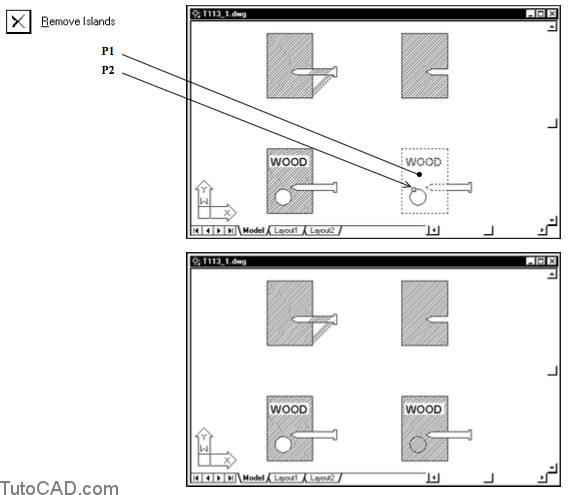
The CIRCLE was automatically detected as an island but you can manually remove islands as required.
– you removed the CIRCLE island and the HATCH object ignored this internal island.
12- Save your changes to this drawing and Close the file.