How to modify HATCH Objects
Here is a tutorial how to modify HATCH Objects in AutoCAD
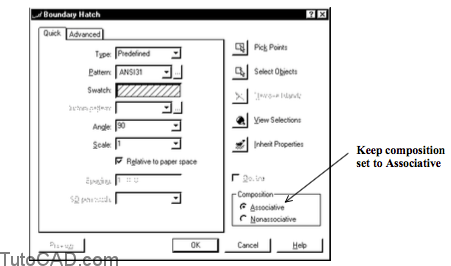
HATCH objects should be associative if you want the option to edit these HATCH objects later on.
– When you create HATCH objects by Bhatch they are associative by default but you can select Nonassociative for the composition.
When a HATCH object is associative the HATCH updates automatically when you change boundary objects.
– for example, you could Move internal islands (e.g. CIRCLE) and the HATCH will update to the new location for these islands.
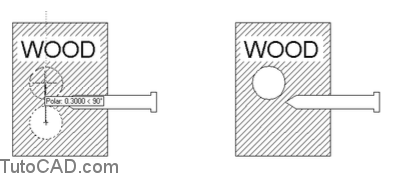
you can Erase internal islands (e.g. CIRCLE) and the HATCH will fill these areas automatically.
you can also Stretch boundary objects (or use grip editing techniques) and HATCH objects will update to the new boundary.

You can modify hatch properties of existing HATCH objects using the Hatchedit command.
- Hatchedit can be explicitly invoked as a command
- or you can select one HATCH object and right-click in the drawing area to invoke a shortcut and then select Hatch Edit.

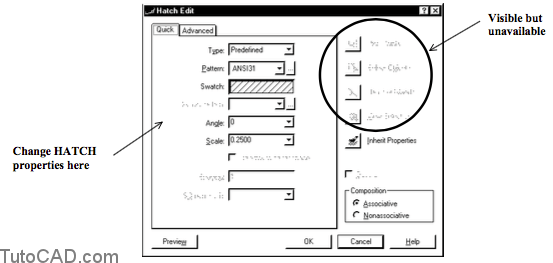
Modify hatch properties using the same interface that you use to create new HATCH objects in the Boundary Hatch dialogue box.
– buttons to define boundaries are included the Edit Hatch dialogue box but they are not available.
You can also use the Inherit Properties button in this dialogue box as an alternative to using the Matchprop command.
You can use (an older version) Hatch to create HATCH obejcts but these HATCH objects are nonassociative.
– you should use Bhatch to create new HATCH objects.
Practice modifying AutoCAD HATCH objects tutorial
- Close the drawing(s) from the previous exercise if required.
- Open the T113_6.dwg drawing in your personal folder.
- Pick Edit + Clear and select the TEXT near P1. Then press <enter> to complete the command.
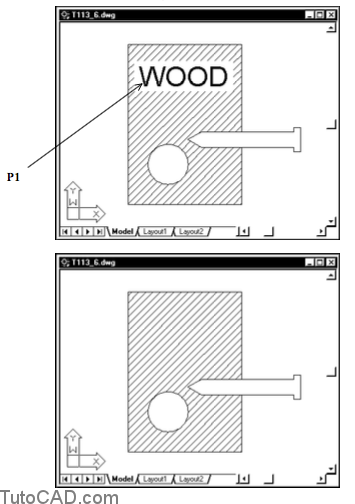
This HATCH object is associated with the boundary objects that were used to create the HATCH.
– when you modify a boundary object AutoCAD tries to update the HATCH to the new boundary.
– in this case the new boundary objects still formed a valid hatch boundary so the HATCH was updated successfully.
4- Pick Modify + Move. Move your pickbox near P1 so that it is not above any objects and then left-click. Move your crosshairs near P2 to invoke an implied Window tool and select the CIRCLE object. Then press <enter> to continue.
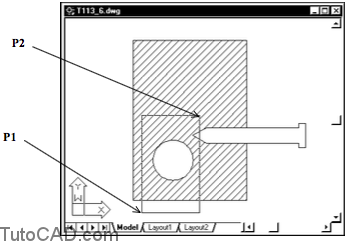
5- Enter 0,2 as the displacement and then press <enter> at the prompt for the second point of displacement to move this CIRCLE 2 units upward.
Once again the HATCH object automatically updates to conform to the new state of the original boundary objects.
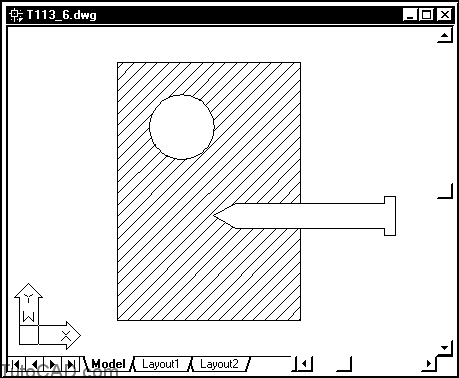
6- Left-click on the HATCH object to select it when no command is running Then right-click in the drawing area to invoke a shortcut and select Hatch Edit. Change the Pattern to ANSI32 and the Angle to 90. Then pick OK.

The Edit Hatch dialogue box is the same as the Boundary Hatch edit box except the buttons to define the boundary are unavailable.
7- Save the changes to this drawing and Close the file.
More Practice
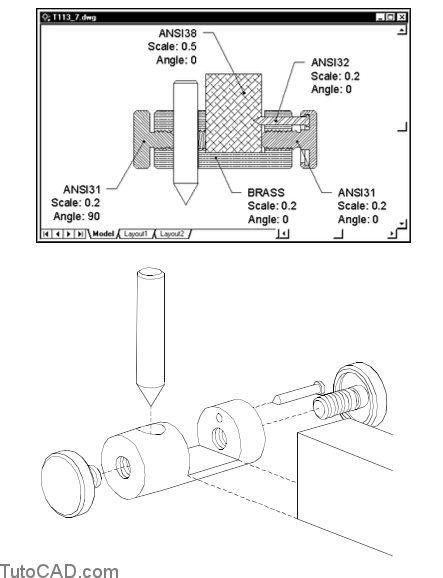
Open the T113_7.dwg drawing in your personal folder.
– create the HATCH objects shown using the indicated
parameters.
– an exploded 3D model view of this beam compass head is also shown below.