Orthographic UCSs in a 3D drawing
Each orthographic UCS corresponds to the standard orthographic view of the same name.
- you may recall the “glass box” analogy used to visualize the relative orientation of orthographic views in 2D drawings.
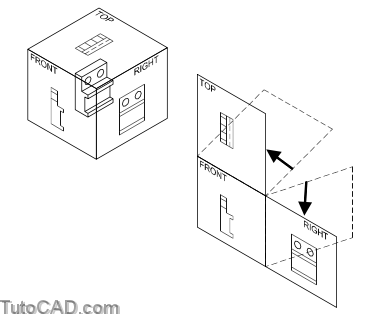
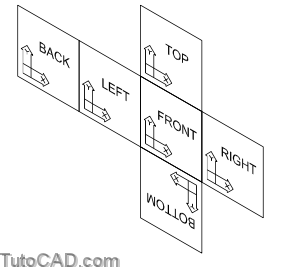
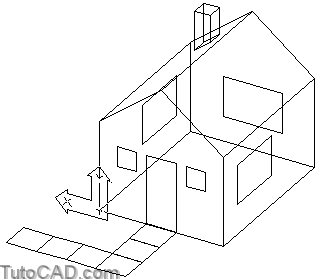
The 6 orthographic views of this “glass box” are shown completely unfolded below with each corresponding orthographic UCS.
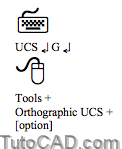
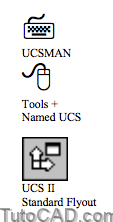
One way to select an orthographic UCS for the current viewport is to use the Ucs command.
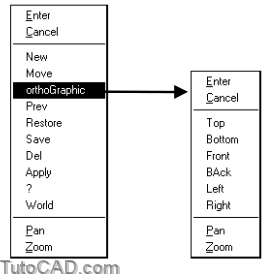
- you can right-click in the drawing area at the first prompt to invoke a shortcut and select orthoGraphic.
- then pick the desired orthographic UCS from another shortcut.
- you can also select these options directly by invoking the desired Ucs option from the Tools + Orthographic UCS menu
The Ucsman command can also be used to select a different orthographic UCS for the current viewport.
- select the Orthographic UCSs tab
- then select the desired UCS and pick the Set Current button ordouble-click on the desired UCS to make it current.
- the depth (see description on the next page) of each orthographic UCS is also reported here.
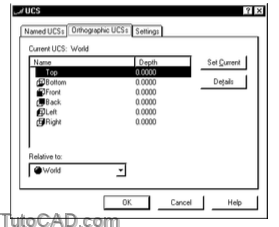
When you start a New drawing from scratch the depth of each orthographic UCS is zero
- which means the initial origin of each orthographic UCS is the same 3D point as the origin of the WCS.
You can use the Move option of the Ucs command to change the depth of an orthographic (or any other) UCS.
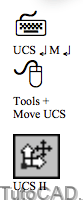
- when you invoke this Ucs option you are prompted to select any other 3D point for the new origin of the current UCS.
- you can also use the Zdepth sub-option and specify a distance to move the origin in the Z axis direction of the current UCS.
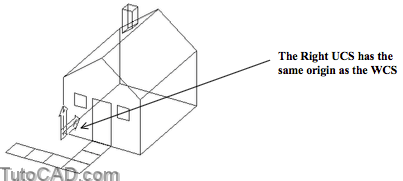
For example, the Right orthographic UCS is shown superimposed on the WCS with both a zero (initial value) and non-zero depth.

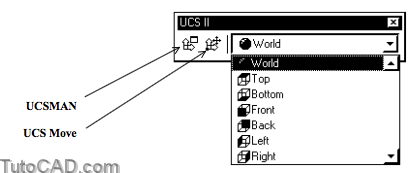
The UCS II toolbar has a drop down list in which you can select an orthographic UCS or the World UCS ( the WCS).
UCSORTHO
Your current UCS may change without your having to explicitly use the Ucs or Ucsman commands.
- you can configure your system to switch to the appropriate orthographic UCS when you restore an orthographic view.

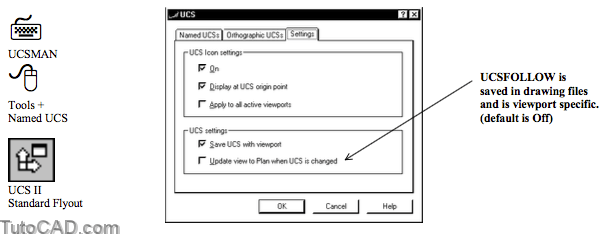
UCSFOLLOW
You can also configure your system to change views automatically so that the current view is Plan (Top) when you change your UCS.
PRACTICE USING ORTHOGRAPHIC UCSs
»1) Close the drawing from the previous exercise if it is open.
»2) Open the T303_2.dwg drawing in your personal folder.
»3) Make sure that OSNAP, OTRACK & POLAR buttons are On in the status bar.
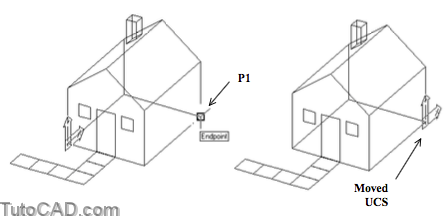
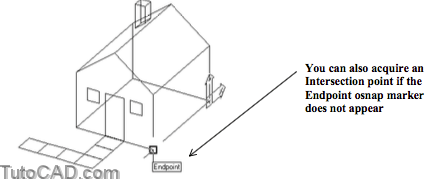
»4) Pick Tools + Orthographic UCS + Right.
»5) Pick Tools + Move UCS & use an Endpoint (Intersection) osnap near P1 as the new origin for the Right UCS.
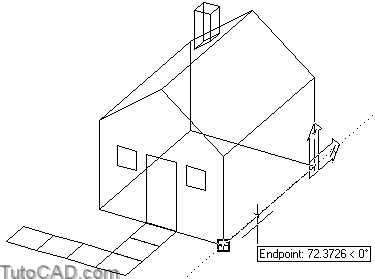
6) Pick Draw + Rectangle. Type TT at the keyboard to invoke the Temporary Tracking point tool. Hold your crosshairs over the Endpoint (Intersection) osnap marker (do NOT left- click) to acquire this as an alignment point for tracking.
7) Move your crosshairs along the bottom edge of this wall to invoke a 0 degree tooltip angle. Type 30 at the keyboard for the distance and press <enter>.
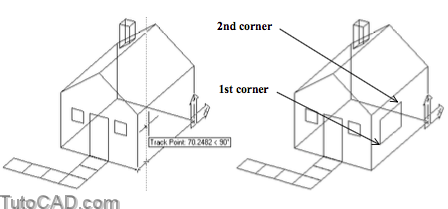
8) Move your crosshairs up to invoke a 90 degree tooltip angle. Type 35 as the distance and press <enter> to supply this point as the first corner of the rectangle. Then enter @72,48 for the other corner of the rectangle.
The location of the origin point in the new UCS is not important when you use tracking to supply points in 3D (as in the last few steps)
- provided the UCS is parallel to the desired drawing plane and the X and Y axes are oriented in the desired directions.
- you could have moved the UCS to any corner on this wall
- you could have even kept the Right UCS at the WCS origin and used the same method to sketch this window.
9) Enter V as the alias to invoke the View command. On the Orthraphraphic & Isometric Views tab make sure the Restore orthographic UCS with View is checked. Select Left then pick Set Current. Pick OK.

10) Use the Previous option of Zoom.

The Left UCS was restored when you restored the Left view.
- the Left UCS remains the current UCS even after you returned to the previous view using the Zoom command.
11) Pick Draw + Rectangle. Use a similar technique to draw the same size window (72wide x 48 high) on the left wall that you just sketched on the right-side wall. Use the same distances from the ground (35) and corner (30) as well.

12) Display the UCS II toolbar (if it is not already displayed you can right-click on any toolbar then select UCS II in the shortcut). Select Right from the drop-down list.

You immediately return to the (moved) Right UCS.
More practice?
13) Pick the first UCS II toolbar button to invoke the Ucsman command. Select the Orthographic UCSs tab and then right-click on the Back UCS in the list to invoke a shortcut. Select Set Current then pick OK.
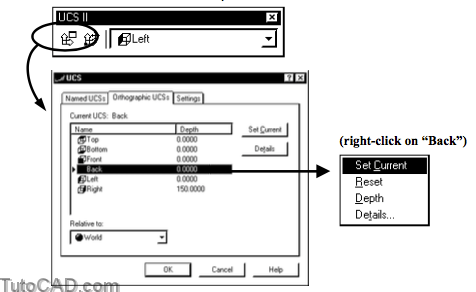
You can also change the Depth of orthographic UCSs from this right-click shortcut menu.
14) Pick Draw + Rectangle. Sketch a large window on the back wall that is 30 inches above the ground & centered horizontally on the wall (39 from corner). The dimensions of the window are 72 inches wide by 48 inches high.
15) Save the changes to this drawing and Close the file.