Using DesignCenter To Import Layouts
You have already seen how you can import a layout from a template drawing file with little effort.

- you can also use DesignCenter to search for layouts in any (closed or open) drawing to drag & drop into the active drawing.
- in the next exercise you will use DesignCenter to import a layout (that you created) into a different drawing.
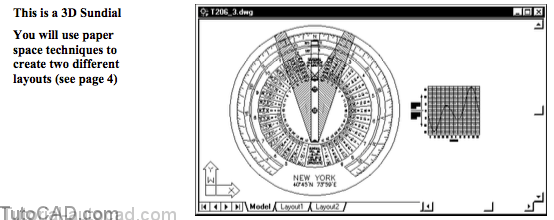
- then you will modify the imported layout to generate a 3D Modellayout for this sundial model.
- you will see how you can shorten page setup time by taking advantage of existing drawings that have already been set up.
PRACTICE USING DESIGNCENTER TO IMPORT A LAYOUT
» 1) Make sure you Save your work in the T206_1.dwg from the previous exercise then Close this drawing.
» 2) Pick File + Open and select the T206_3.dwg drawing in your personal folder and pick Open.
3) Pick Tools + AutoCAD DesignCenter if DesignCenter is not already open. The illustrations that follow show DesignCenter in a floating window but it may be docked on your system. You can use either approach. If none of your DesignCenter buttons are pushed in the illustrations that follow will resemble your system. The first illustration shows Open drawings in the palette but this is not necessary.
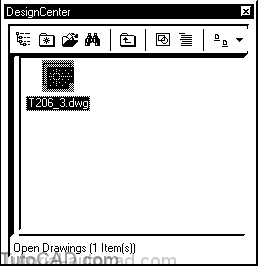
If you want to see Open Drawings (only) in the palette left-click on the Tree View button then left-click on the Open Drawings button.
- then you can left-click on the Tree View button again.
4) Left-click on the DesignCenter Load button and select the T206_1.dwg drawing that you just Closed. Then pick the Open button to load this drawing into the palette.
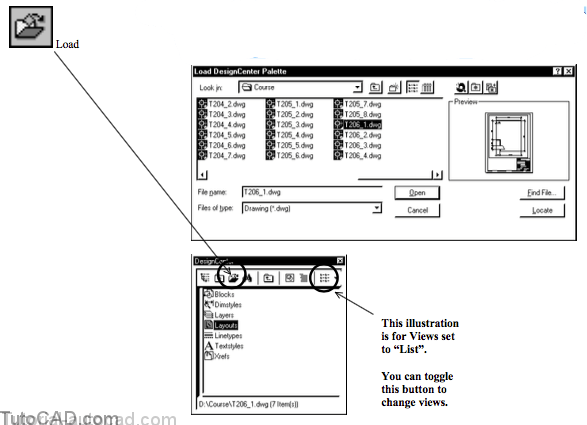
Loading a drawing into the palette is NOT the same as Opening a drawing in AutoCAD
- the T206_1.dwg drawing file is presently closed.
- you are using DesignCenter to examine the contents of this file.
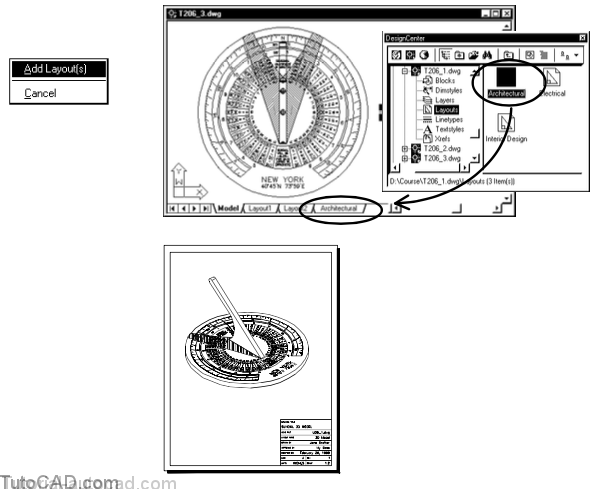
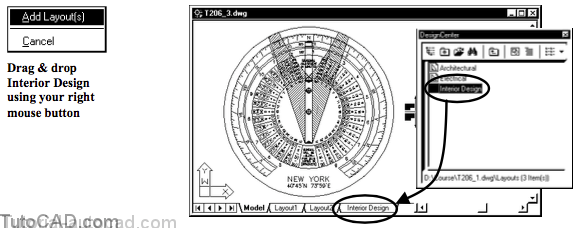
» 5) Double-click on the Layouts icon in the palette.

6) Select the Interior Design layout in the palette & use your right mouse button to drag the layout into the T206_3.dwg drawing window. When you release your right mouse button a shortcut menu will appear. Select Add Layout(s).
7) Pick Tools + AutoCAD DesignCenter to dismiss DesignCenter (if you wish).
8) Right-click on the new Interior Design layout in the active drawing and select Rename from the shortcut menu. Enter 3D Model as the new name and pick OK. Left-click on the 3D Model tab to make this new layout the current layout.
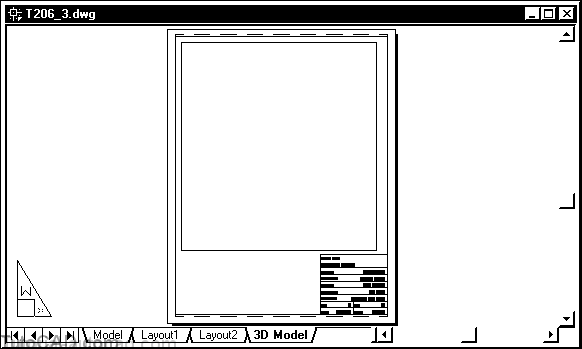
All parameters of the Interior Design layout were imported.
- the model in this drawing is much smaller than the model in the other drawing so you do not see the model in the viewport.
- you will have to use display commands in this viewport before you can see the model but this viewport is locked right now.
» 9)Select the viewport to display the viewport grips and then right-click to invoke a shortcut. Pick Display Locked and then pick No to unlock the viewport display.

10) Left-click on PAPER in the status bar to switch to MODEL.
11) Pick View + 3D Views + SW Isometric.
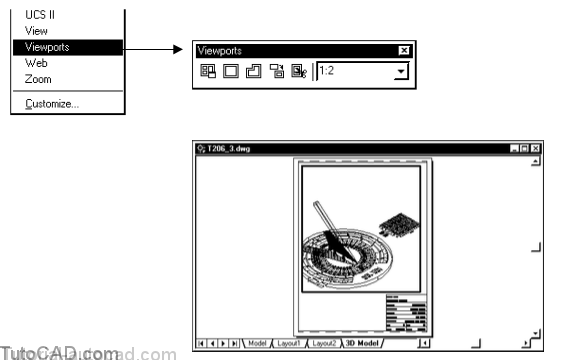
12) If the Viewports toolbar is not displayed, right-click on any toolbar to invoke a shortcut and select Viewports. Then select 1:2 as the viewport scale in the Viewport toolbar.
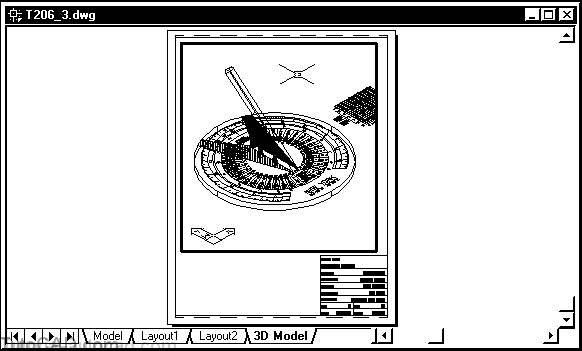
» 13) Pick View + Pan + Realtime and drag your model so that it is approximately centered in the viewport and press <Esc>.
» 14) Pick Format + Layer. Note that there are two layers from the T206_1.dwg file (do not close this box yet).
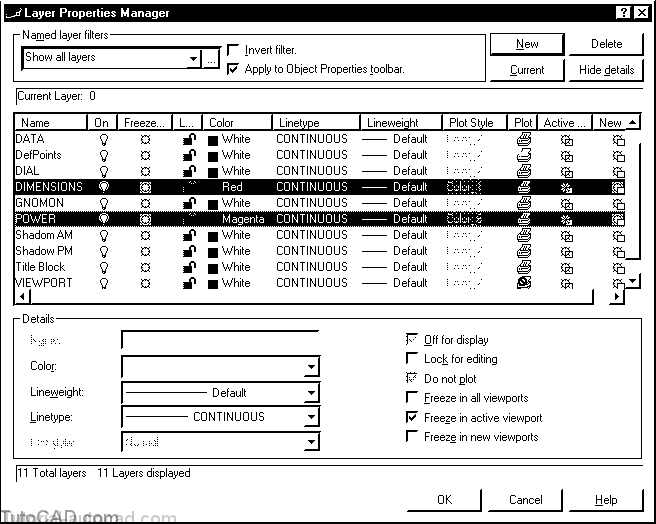
DIMENSIONS and POWER layers were frozen in the active viewport of the layout that you imported into this drawing.
- so these layer definitions came in with the layout.
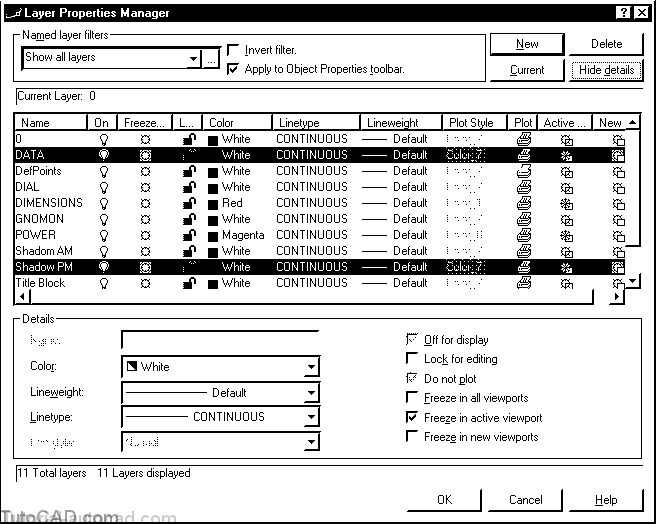
» 15) Select the DATA and Shadow PM layers and check the Freeze in active viewport box in the details area. Then pick OK to complete the command.
» 16) Left-click on MODEL in the status bar to switch to PAPER.
» 17) Select the viewport border to display the grips of the viewport and then right-click to invoke a shortcut. Pick Hide Plot then pick Yes.
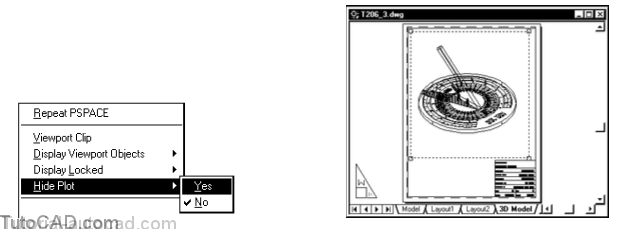
Now when you Plot this layout the objects in this viewport will have hidden lines (lines behind surfaces) automatically removed.
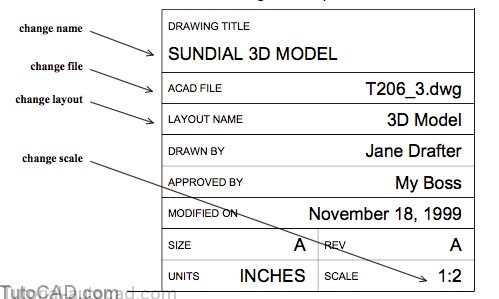
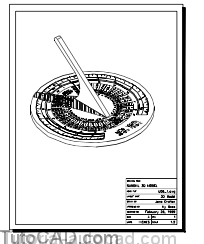
18) Pick Modify + Attribute + Single and select any part of the title block to invoke the Edit Attributes dialogue box. Use the illustration as a guide to update this title block.
» 19) Pick File + Plot Preview then press <Esc> to exit.
Setting up this layout was easier (this time) because you did most of the work in another drawing (T206_1.dwg).
- save time with DesignCenter by re-using existing layouts.
» 20) Pick File + Save to update the changes to T206_3.dwg andprepare for the next exercise.